 Media Coverage
 Press Release
Step-by-Step Snowflake Integration with Microsoft Fabric
Power Up Your Data Analytics with Snowflake and Microsoft Fabric
Achieving Seamless Data Sharing and Analysis
Why Integrate Snowflake with Microsoft Fabric?
Stepwise Guide for Snowflake and Microsoft Fabric Connection
Benefits of Snowflake-Microsoft Fabric Integration for Analytics
Key Features of Enhanced Analytics with Snowflake
Setting Up Your Snowflake Account for Integration
Configuring Microsoft Fabric for Snowflake Connection
Data Sharing and Analytics Benefits
Troubleshooting Common Integration Issues
Integrating Snowflake with Microsoft Fabric involves a systematic approach to ensure that data flows efficiently from Snowflake’s cloud-based data warehouse into Microsoft Fabric’s comprehensive data platform. In this blog we will explore how to achieve this integration effectively and share best practices for maximizing the strengths of both platforms. By connecting Snowflake’s robust data storage and querying capabilities with Microsoft Fabric’s advanced analytics and data management features, organizations can create a powerful data ecosystem.
Prerequisites
- Snowflake Account and Access
Ensure that you have an active Snowflake account with the necessary permissions to access databases, warehouses, and schemas. You should also have your credentials ready, including Server URL, Warehouse name, Username, Password, and Role. - Microsoft Fabric Subscription
You need an active Microsoft Fabric subscription with appropriate permissions to create and manage workspaces, warehouses, lakehouses, and dataflows.
Data Flow Overview

To analyze and manage data from Snowflake within Microsoft Fabric, follow the outlined steps for setting up your workspace, creating necessary data structures, and loading data from Snowflake. This guide will prepare your data for insightful analysis within Power BI.
Steps to load the data:
Step 1
Creating a new workspace in Power BI Service
- Click on the workspace tab, then add a new workspace, and name it accordingly

Step 2
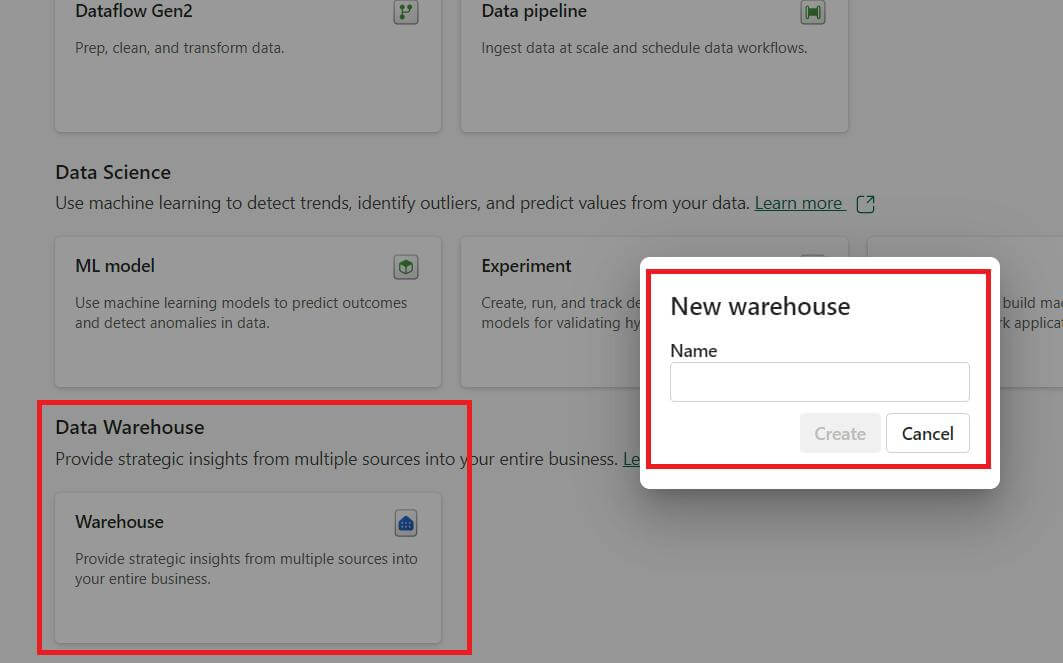
Creating a Warehouse: Here, we are setting a destination for our data flow
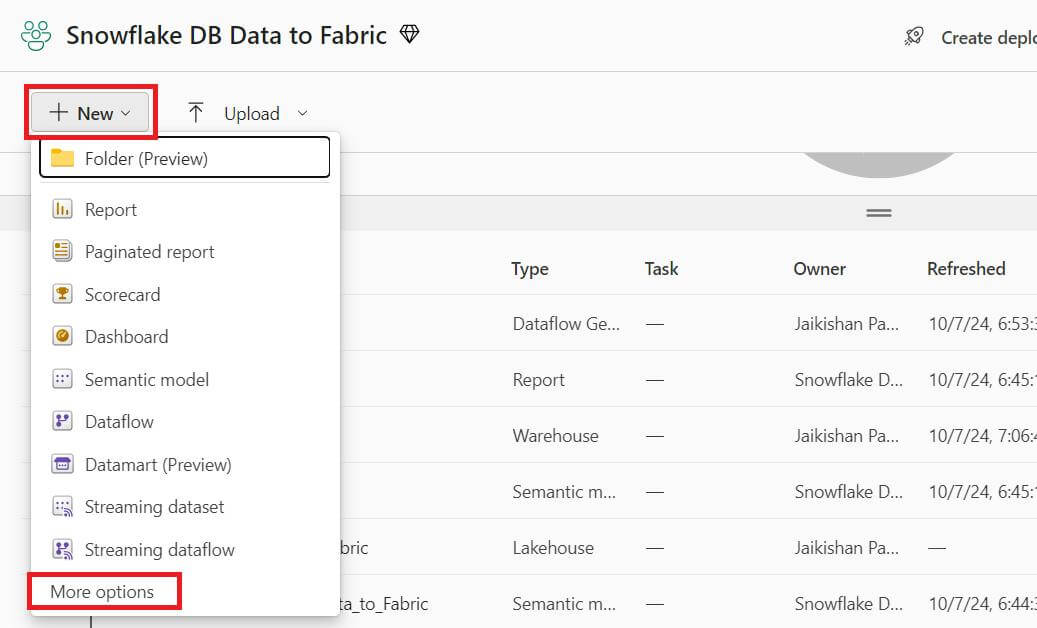
- Open the Newly Created Workspace >> Click on New>> More Options
- Now under the Data Warehouse pane, select Warehouse >> Name it accordingly
Step 3
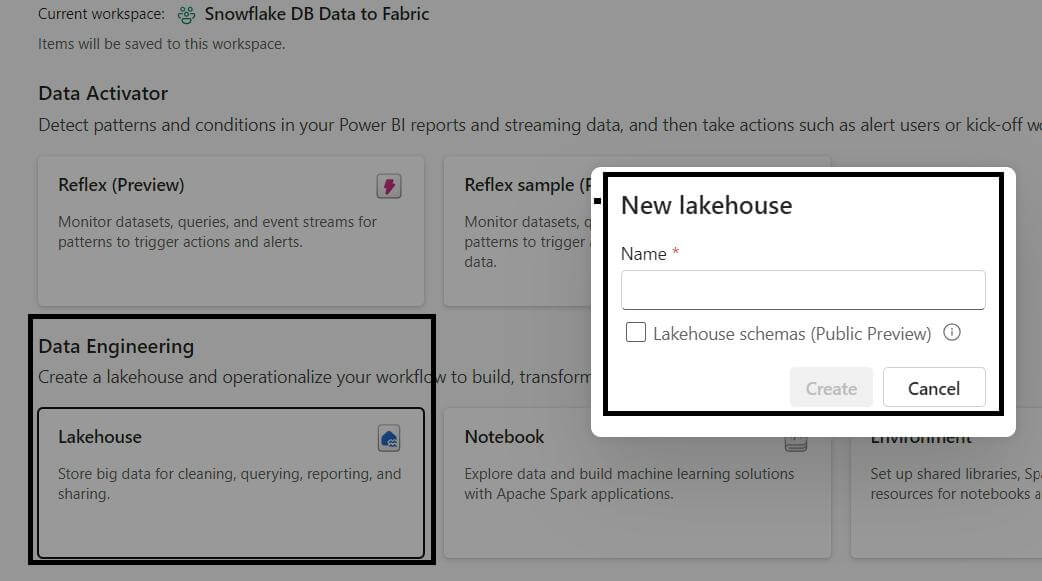
Creating a Lakehouse: For this particular Use Case we are setting up a destination path for dataflow to both Lakehouse and Warehouse.
- Open the Newly Created Workspace >> Click on New>> More Options
- Now under the Data Engineering pane, select Lakehouse >> Name it accordingly
Step 4
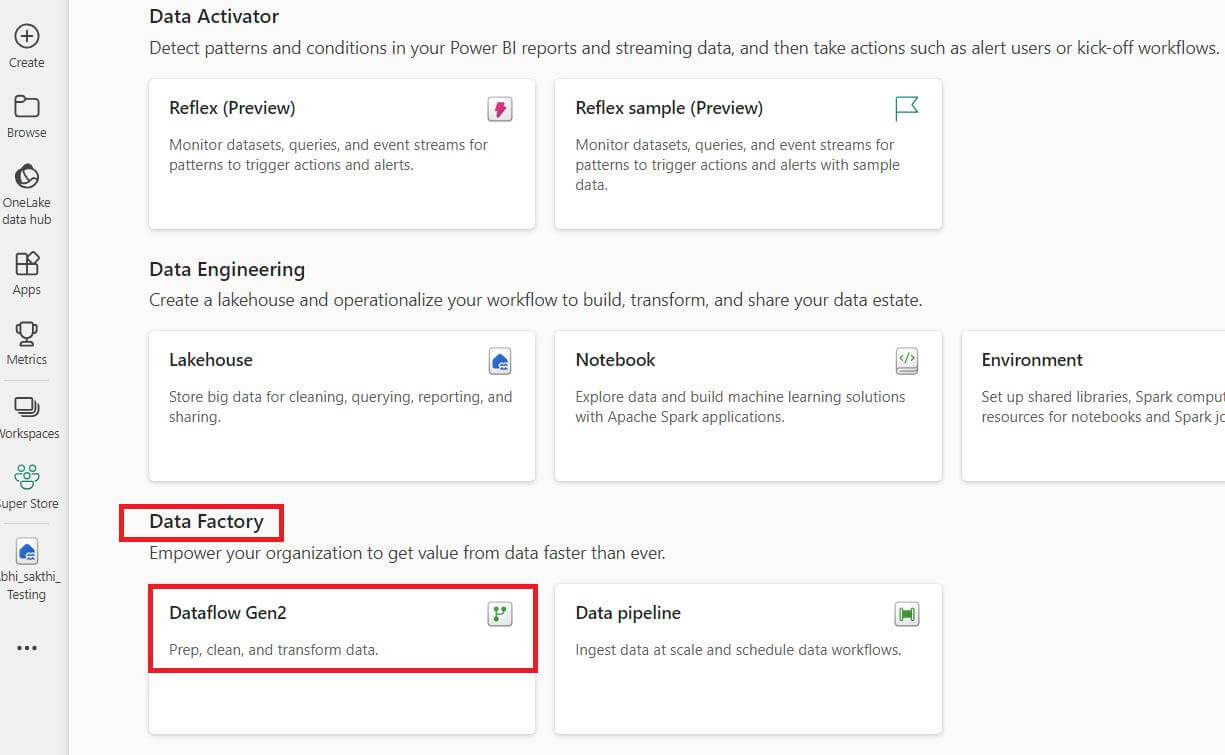
Creating Dataflow
- Open the Newly Created Workspace >> Click on New>> More Options
Now under the Data Factory pane, select Dataflow Gen2
Step 5
Now Click on the newly created Dataflow, and we will see a Power query window. Here, we can load the data from Snowflake, and perform the desired transformations or customizations (Removing duplicates, Custom columns, calculations).
Loading the data
- Click on Get data tab >> More..>> Search “Snowflake” in the Search box
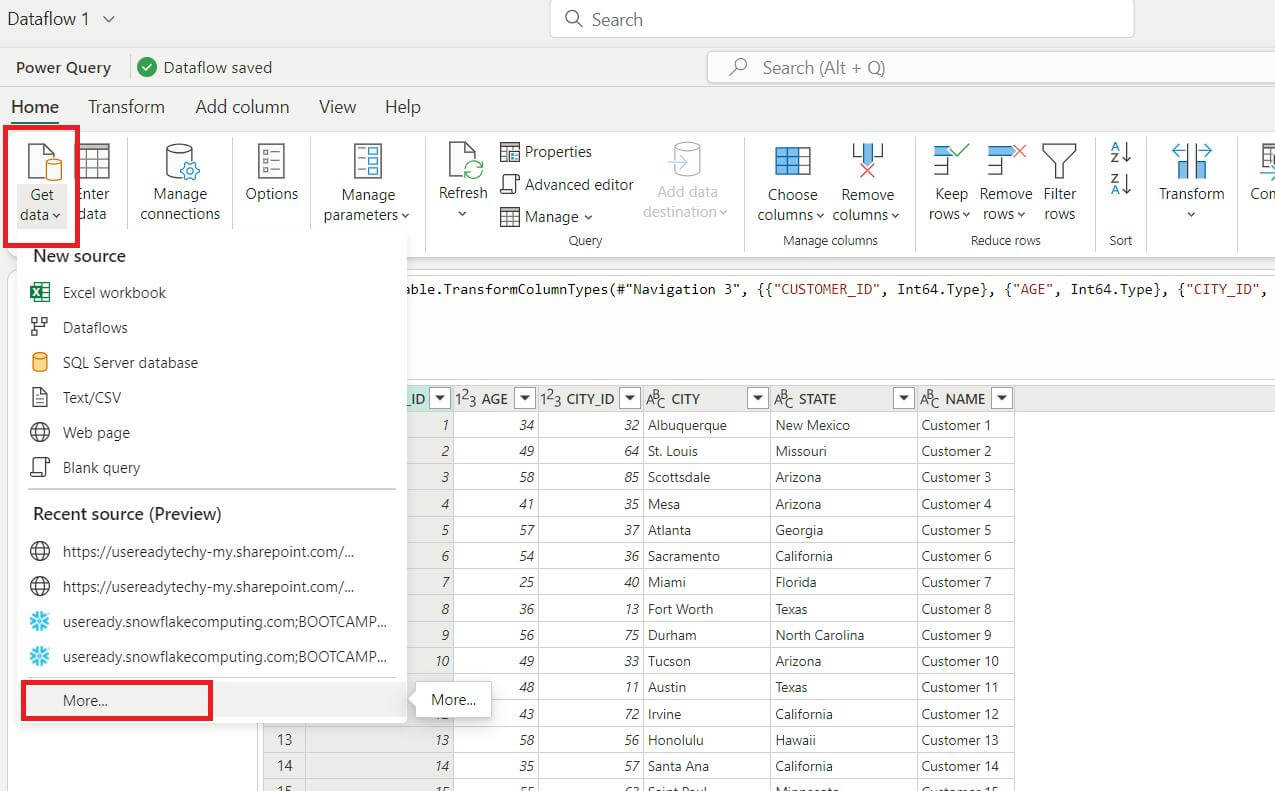
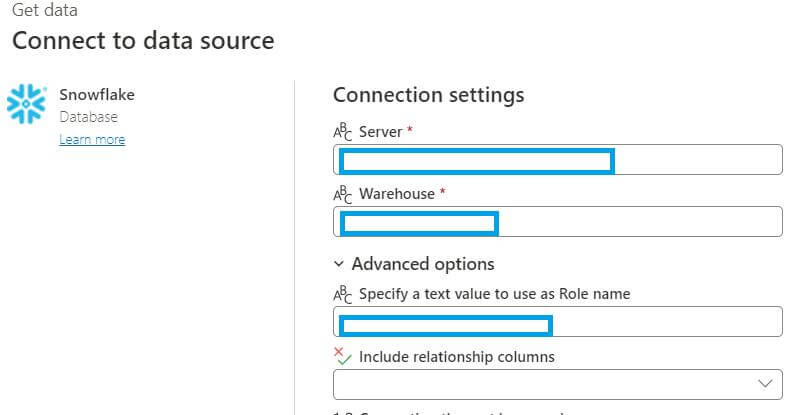
- Click on Snowflake Database, and a new prompt will appear for passing the credentials
- Fill up the Mandatory blanks – Server, Warehouse, Username, and Password
Note: You need to specify the Role as well to see the data from the desired database
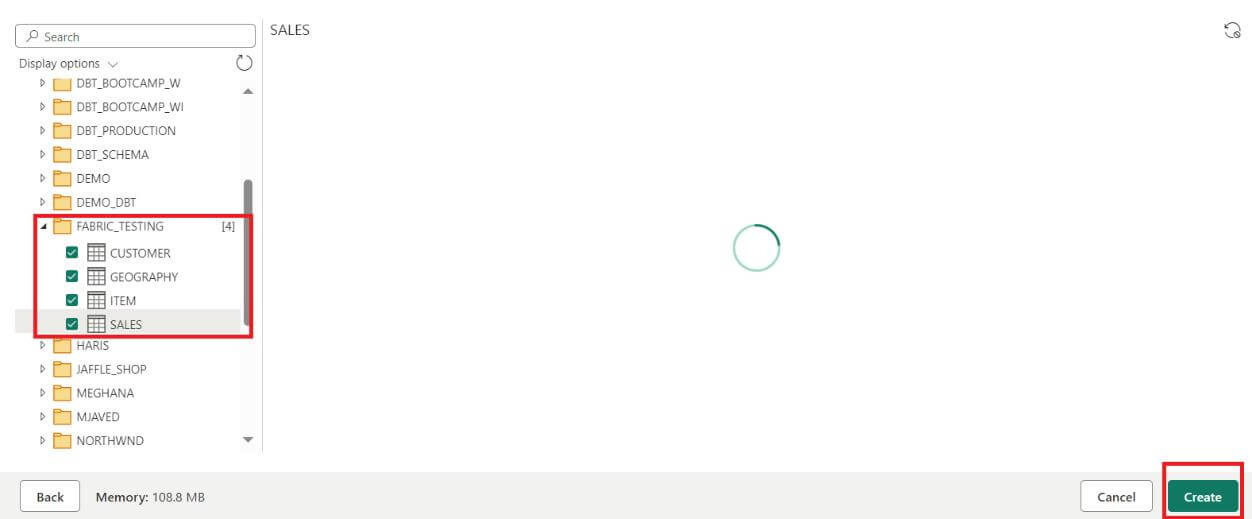
After clicking next, we will see a prompt for Snowflake database and schemas, Select the desired Tables from the respective Schema
Step 6
After loading all the tables, we will see this view in the Power Query
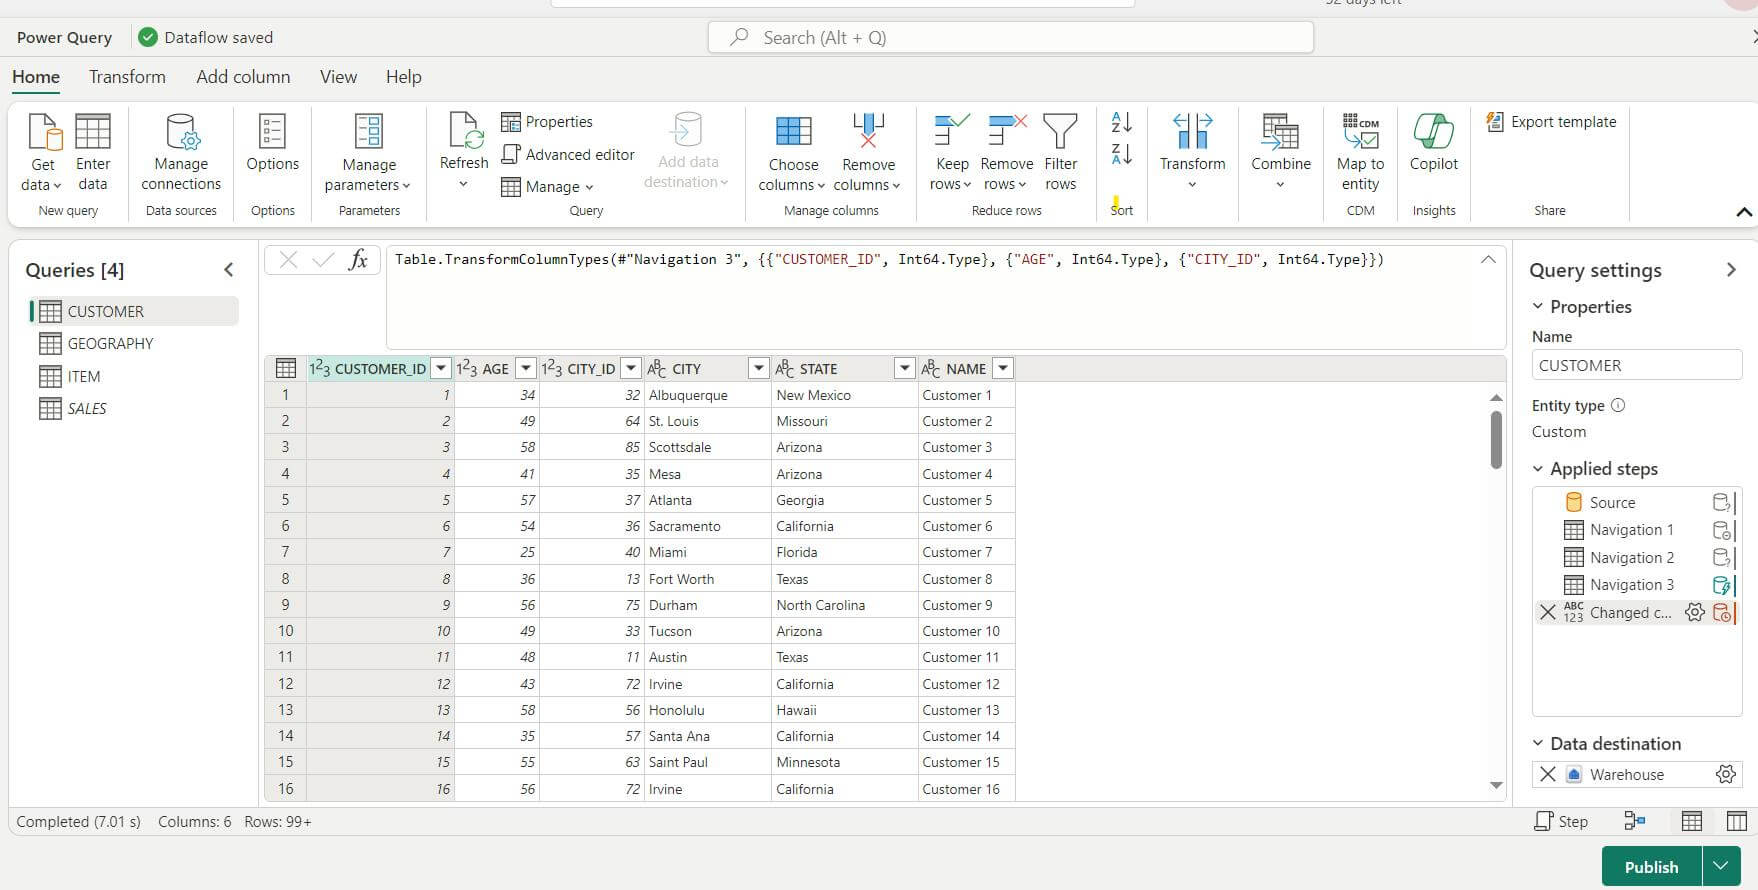
Now we can perform transformations in the tables accordingly, and after finishing, we need to set the Destination of each table, in our case we are pointing the destination to the Warehouse that we have created.
Step 7
Pointing the Destination of tables to Warehouse
- Select the table, navigate to the Data destination setting icon >> Select Warehouse >> Click on Next
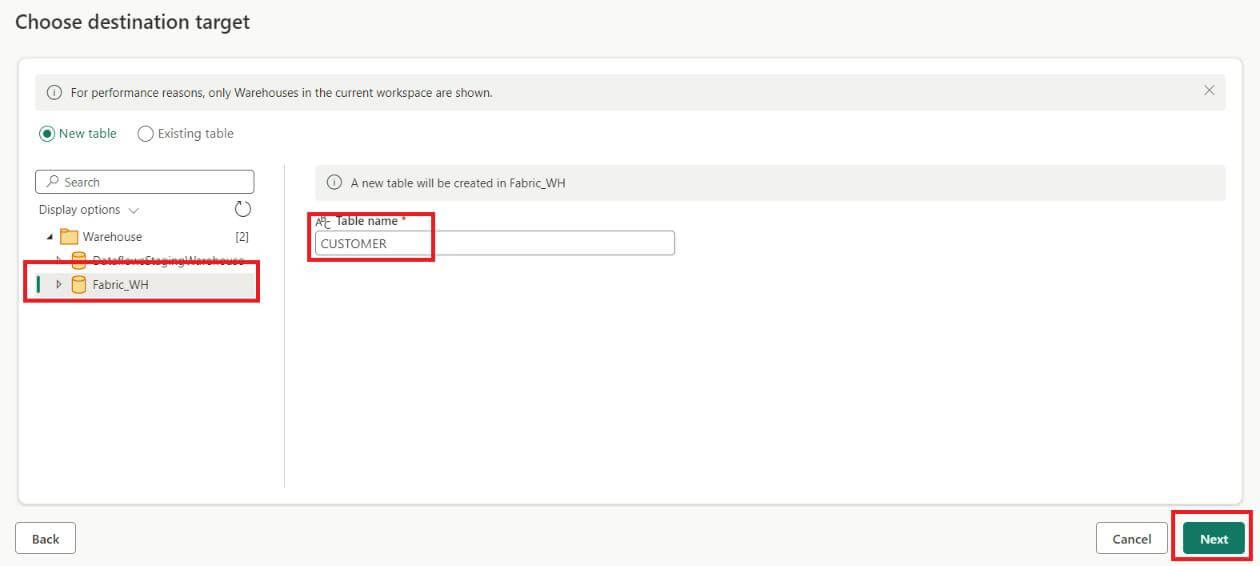
Select the warehouse, give the name of the table, and hit next
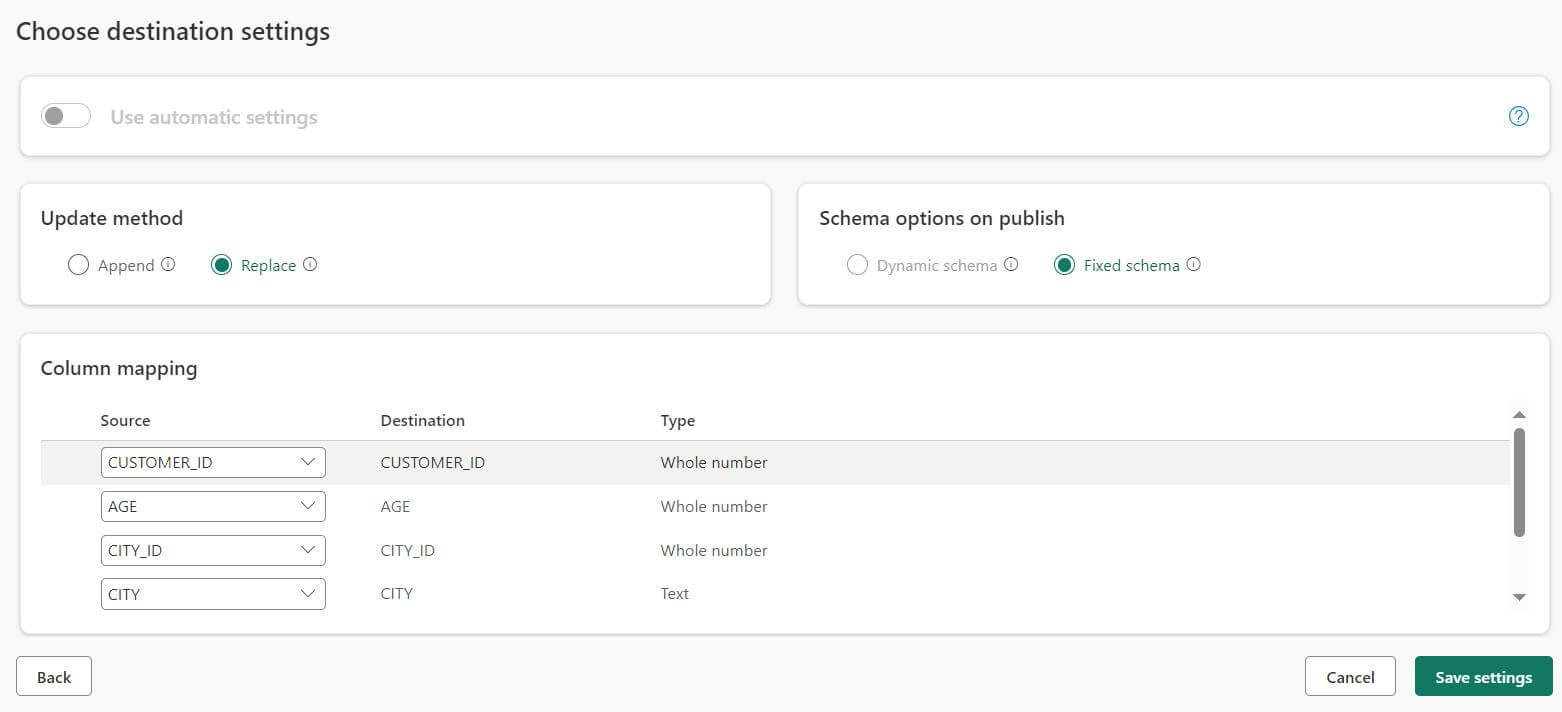
- A new prompt will appear. Here, we can change the data types of the columns. However, if we don’t want to change anything, just click on save settings, and our table will be loaded in the warehouse
Step 8
Creating a Data Model
- After setting the destination for all the tables to the Warehouse, go to the Workspace and select the desired Warehouse. There we can see all the tables
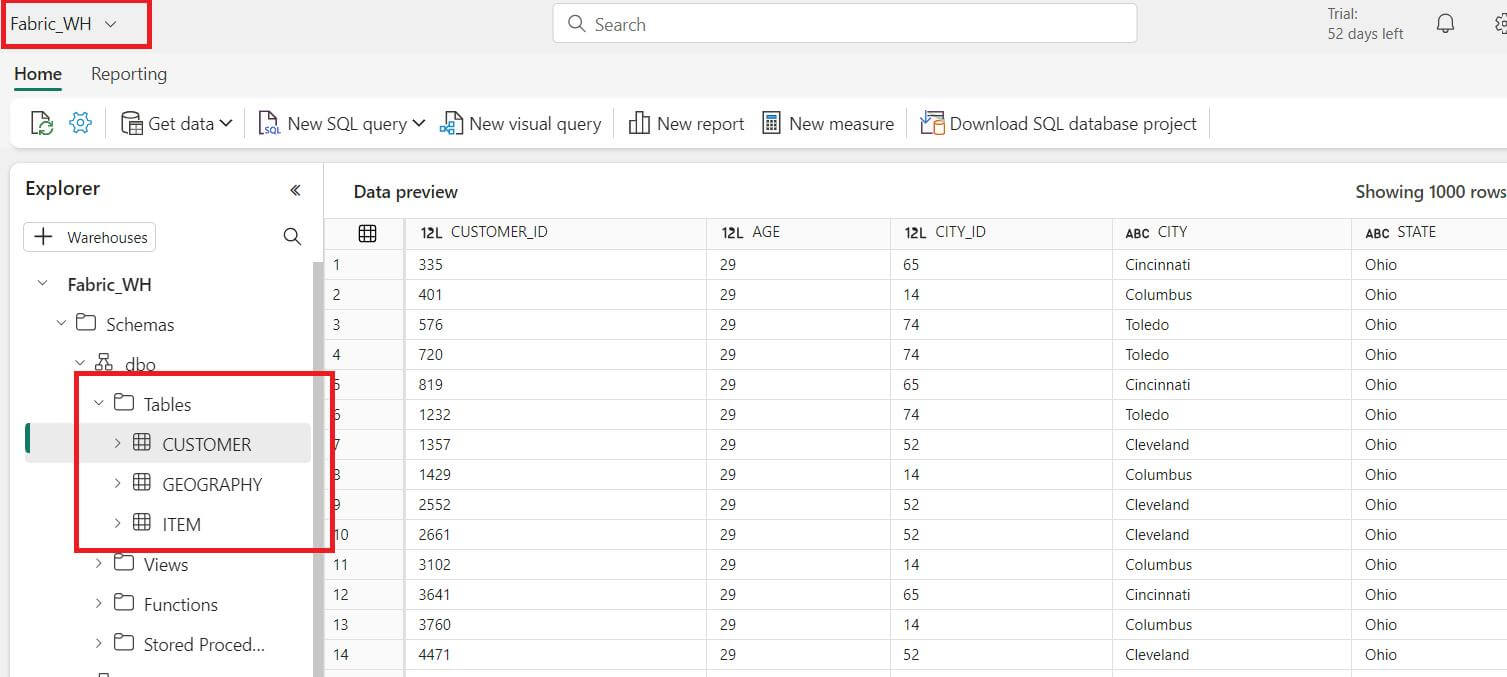
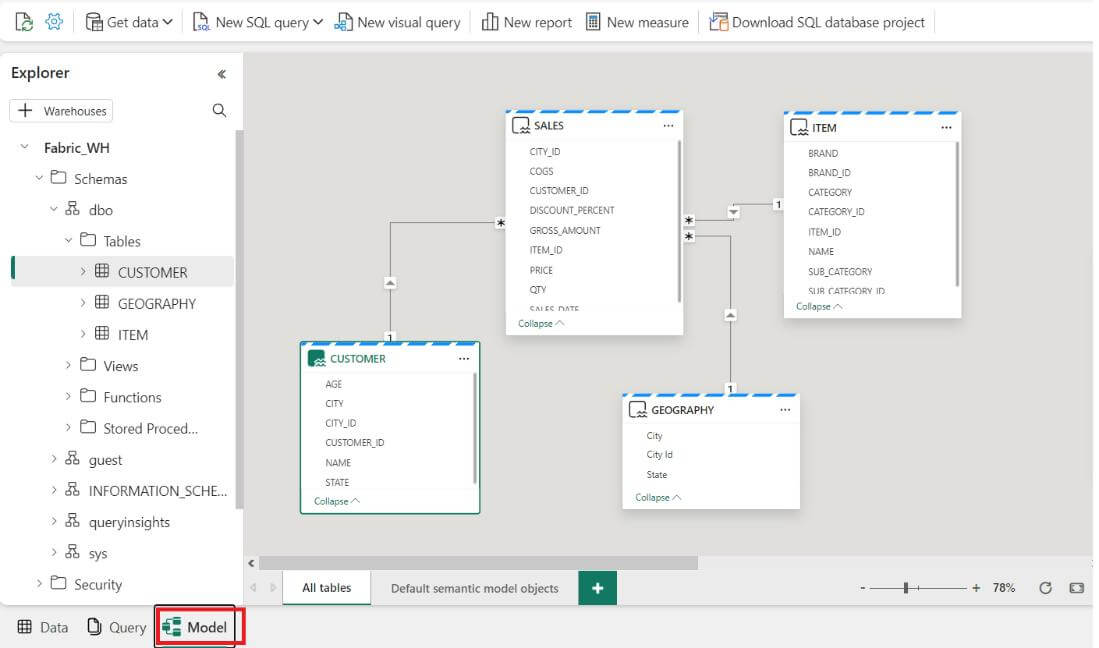
Now to create a data, click on the Model tab below, here we can build the model to develop the report
Step 9
Creating a Power BI Report
After making appropriate relationships among the tables, we can create a Power BI Report.
- Click on the Data tab next to the query tab. There we need to navigate to the “New Report” option
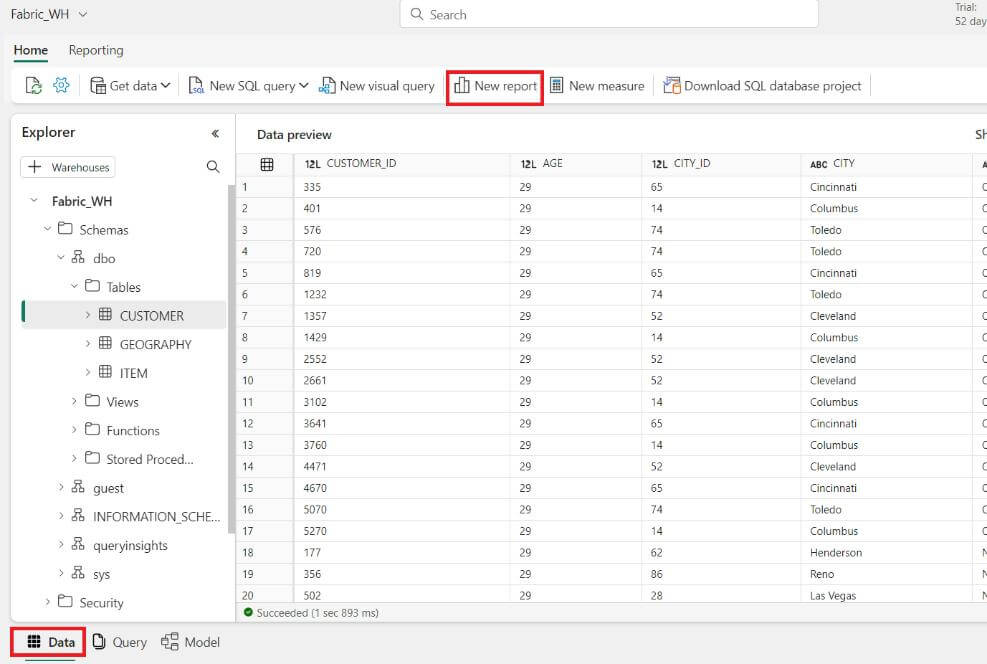
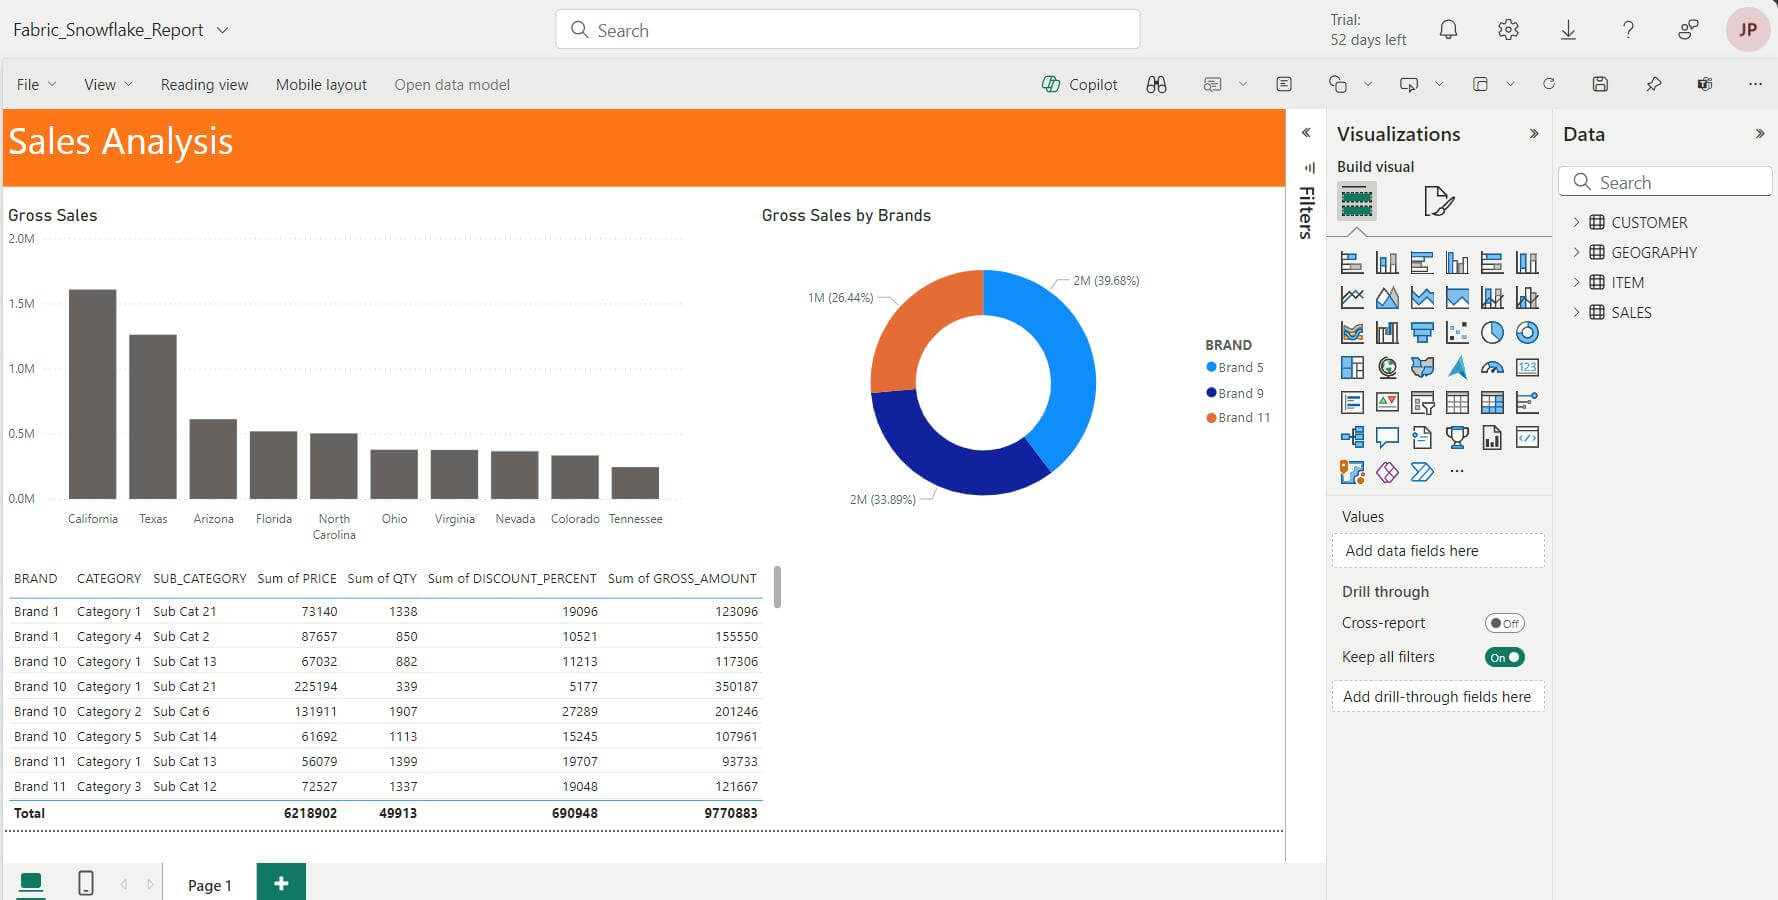
A new window of the Power BI report will appear. Here we can create a report, based on data we have loaded
Conclusion
Integrating Snowflake with Microsoft Fabric involves creating and configuring workspaces, warehouses, and lakehouses, setting up dataflows, and loading data from Snowflake into Microsoft Fabric. This integration provides a robust platform for managing and analyzing data, combining Snowflake’s scalable data warehousing capabilities with Microsoft Fabric’s advanced analytics and data management features. This streamlined approach ensures efficient data handling and insightful analysis, empowering organizations to make informed business decisions.