 Media Coverage
 Press Release
Adding a Navigation Menu to Your Tableau Dashboard
Enhancing User Experience with Navigation Menus
Creating Intuitive Navigation in Tableau

An engaging and user-friendly Tableau dashboard is more than just displaying data; it’s also about a seamless and intuitive navigation. Imagine trying to navigate a dashboard filled with different metrics, charts, and insights without any guide or structure. Without a clear path, the experience would be confusing and frustrating, undermining the effectiveness of the dashboard, however informative.
We need navigation menus elsewhere too, like when we integrate Tableau dashboards with other legacy BI tools, we need to add a navigation button to let users seamlessly switch between different dashboards. The point is, navigation menus are an important part of the Tableau user experience.
Why Add a Navigation Menu to Your Tableau Dashboard?
Step-by-Step Guide to Creating a Navigation Menu
Best Practices for Dashboard Navigation
Examples of Effective Navigation Menus
Setting Up Your Navigation Menu
Customizing Navigation Buttons
Linking Dashboard Sections
Testing and Refining Your Navigation
In this blog post we will walk you through the process of adding a navigation menu to your Tableau dashboard. By the end of this stepwise guide, you should be able to design a navigation menu that not only looks good but also enhances the overall user experience of your Tableau dashboard.
Step 1
Prepare Your Worksheets
Before you can begin, make sure that you have all the worksheets and dashboards ready. For instance, we have:
- Dashboard 1: Summary
- Dashboard 2: Sales Report
- Dashboard 3: Profit Report
- Dashboard 4: Profit Detail Report
- Dashboard 5: Sales Detail Report
Step 2
Add Navigation Buttons
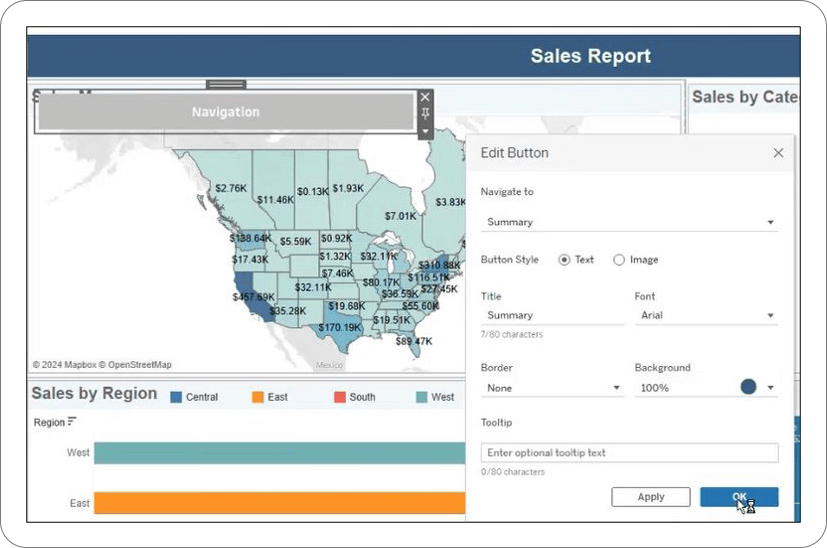
- Add a vertical floating container.
- Inside this container, place the navigation button.
- Edit the navigation button and select the dashboard where it Navigate to.
- Do the proper formatting and click Ok.
Step 3
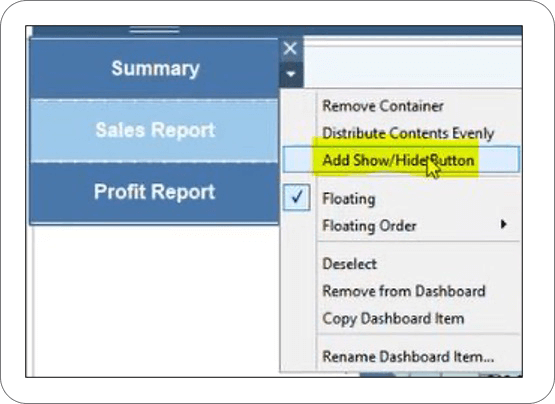
Add Show/Hide Button
Add the Show/Hide Button to hide and unhide the navigation menu.
- Click on the drop-down of the navigation button vertical container and select Add Show/Hide Button.
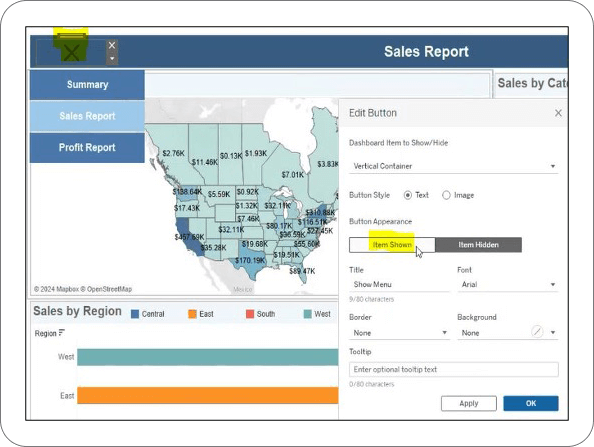
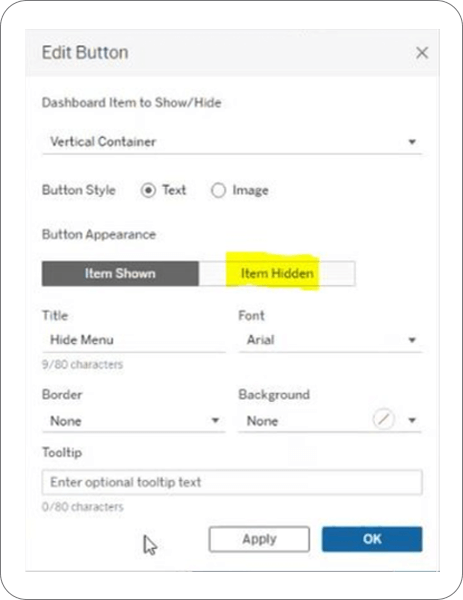
- Format this button for Item Shown and Item Hidden then click Ok.
Note: We can create a sub-menu too by following the above steps
Visualization
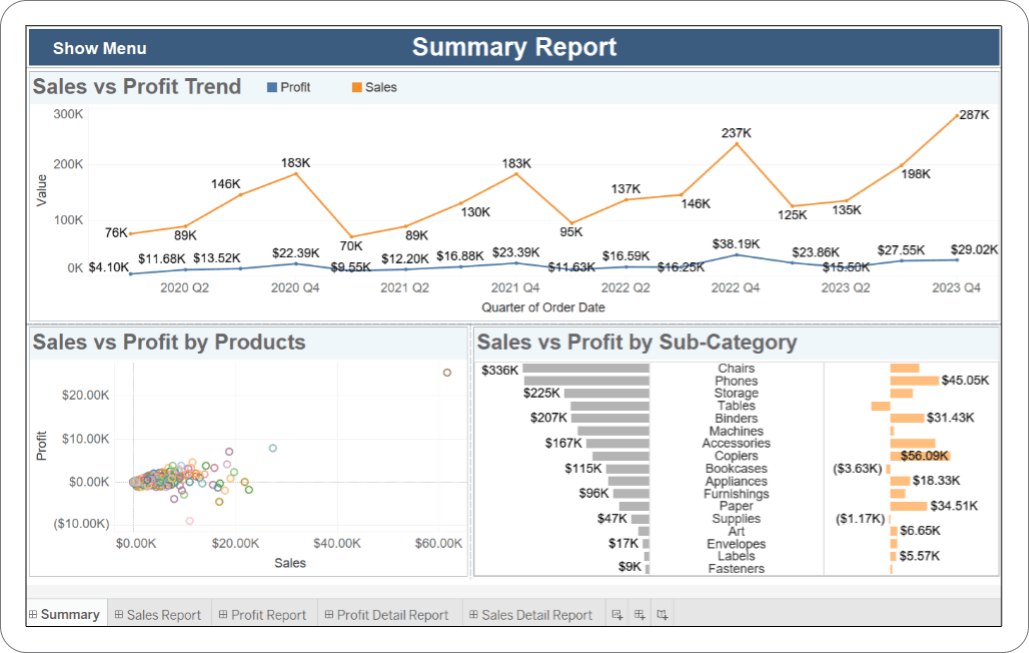
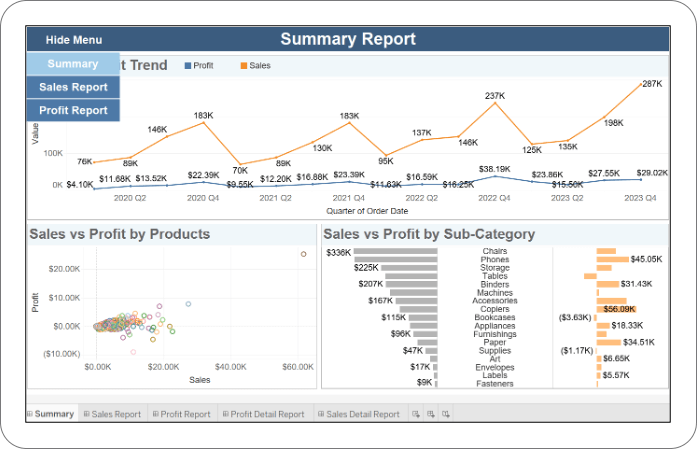
Summary Report
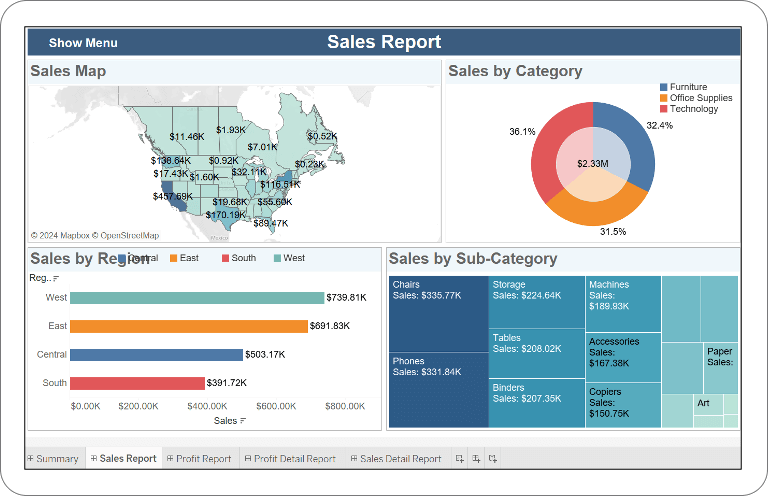
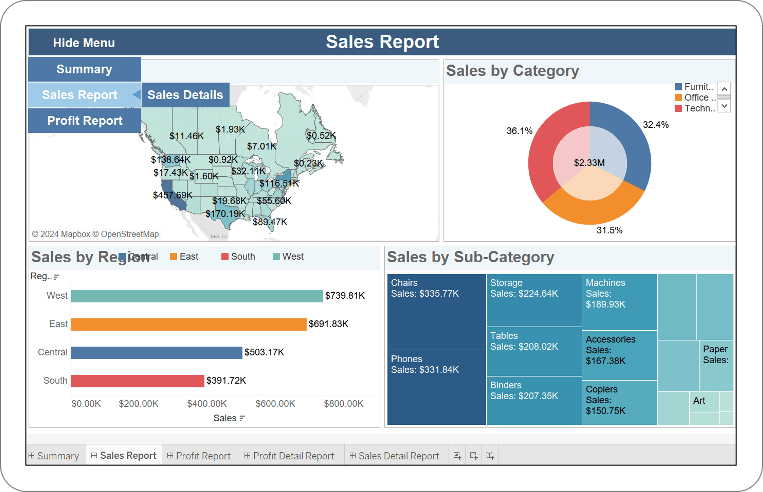
Sales Report
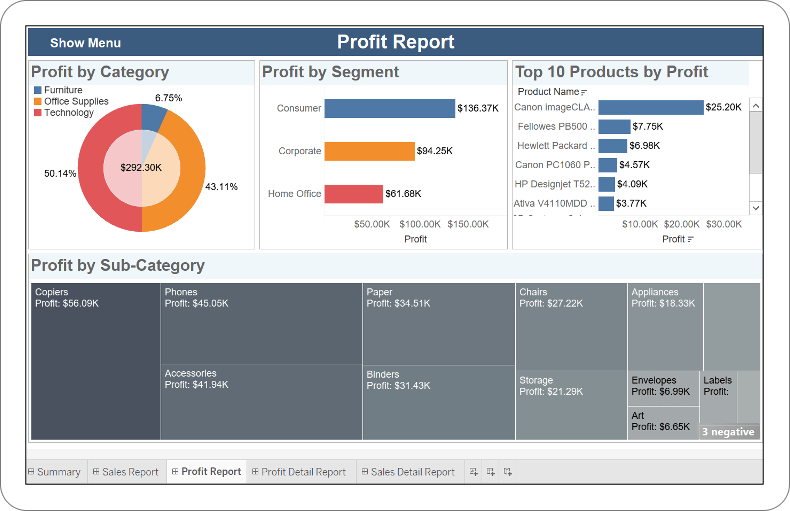
Profit Report

Adding a navigation menu to your Tableau dashboard can significantly improve its usability and interactivity. By following the steps outlined in this guide, you can create a professional and user-friendly navigation system that enhances the overall effectiveness of your dashboard.
Thanks for reading!