Enhancing Interactivity: Resetting URL Actions to Blank on Tableau Dashboards
Mastering User Experience: Tips for Resetting URL Actions on Tableau Dashboards
Streamlining Navigation: Utilizing Blank URL Actions in Tableau for Seamless Dashboards
URL actions are one of the very powerful Dashboard actions in Tableau. Though not used as extensively as the Filter Actions or the Highlight Actions, URL actions have their own presence on Tableau Dashboards. The common ones being Launching a Website, Navigating to shared network, Filter other Dashboards based on the parameters passed in the link, Launching an email, Generate CSV and PDF files from dashboards etc. The newer versions of Tableau have Set Actions, Parameter Actions, Button features etc.
In this blog, we will be discussing a very simple use case of resetting a URL action. We need to be a little cautious here. Resetting an action can mean a little different to Filter Action and Highlight Action where the target sheets resume to the original state. We are not trying to replicate that feature because URL actions once activated cannot be reset. So, we are attempting to do something similar but more as a workaround or alternative. That is the reason to mention it as ‘BLANK’ in the title.
Understanding URL Actions in Tableau Dashboards
Implementing Blank URL Actions: Step-by-Step Guide
Best Practices for Resetting URL Actions in Tableau
The original problem presented was like this. A financial Operations dashboard has aggregated daily exceptions showing Fails, Exposures, pending Settlements etc. for each of the employees. When a senior executive selects an employee name, the dashboard should display the employee’s directory information in a Web Page within the dashboard. (The web page would include the photo, email id, location, manager, hierarchy etc.) Since we cannot use the same features for this blog, we will simulate something simple for the purpose of learning.
1) A Dashboard that shows the Top States in USA with their population.
2) The dashboard also has some city related information displayed in other sheets.
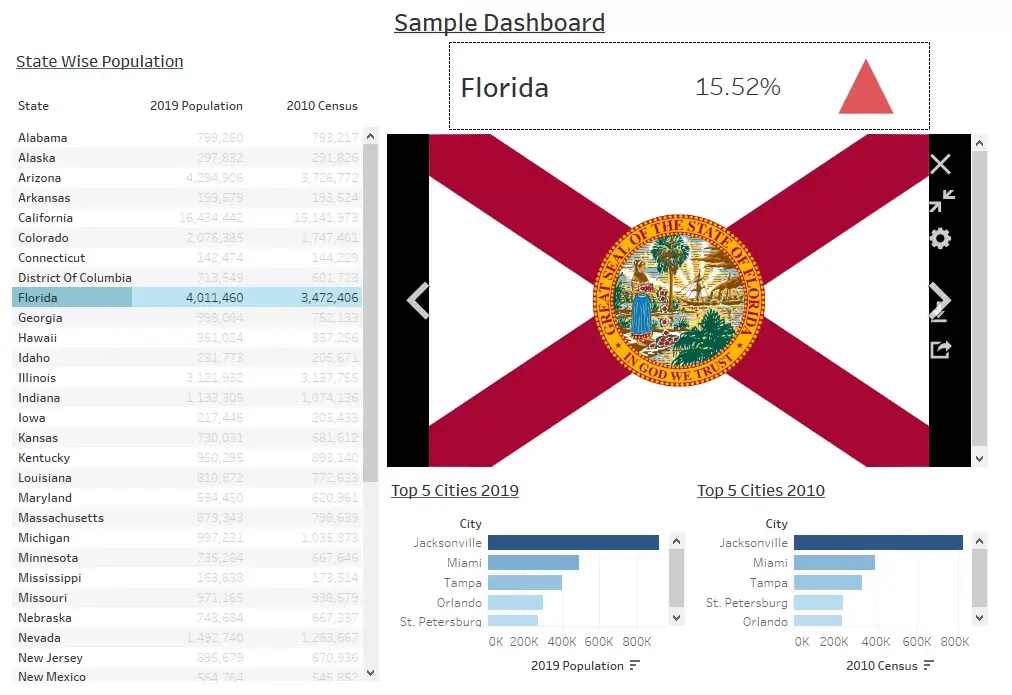
3) When a State is selected, the Web Page object in the dashboard should display its flag.
For this, first we need a simple Dashboard to start with. Here, the focus is not on the Dashboard but the Dashboard actions and the Web Page object.
For this example, we are using a very simple data of the Top 200 US Cities by population (encompassing 43 States).
The data is taken directly from this link http://worldpopulationreview.com/us-cities/
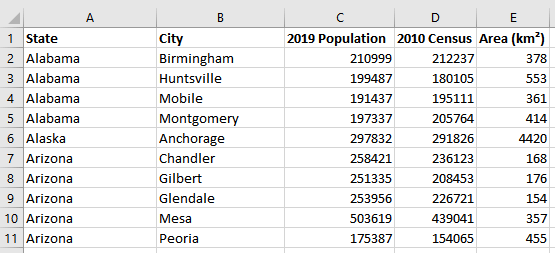
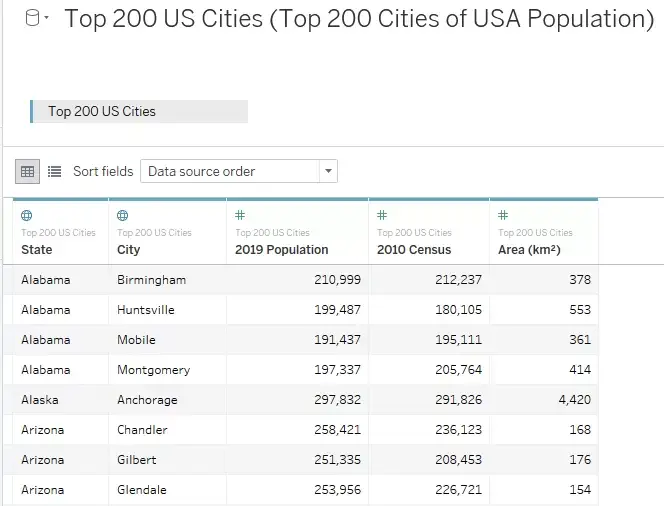
Using this data in Tableau, with the required actions and placeholders a Dashboard is created.
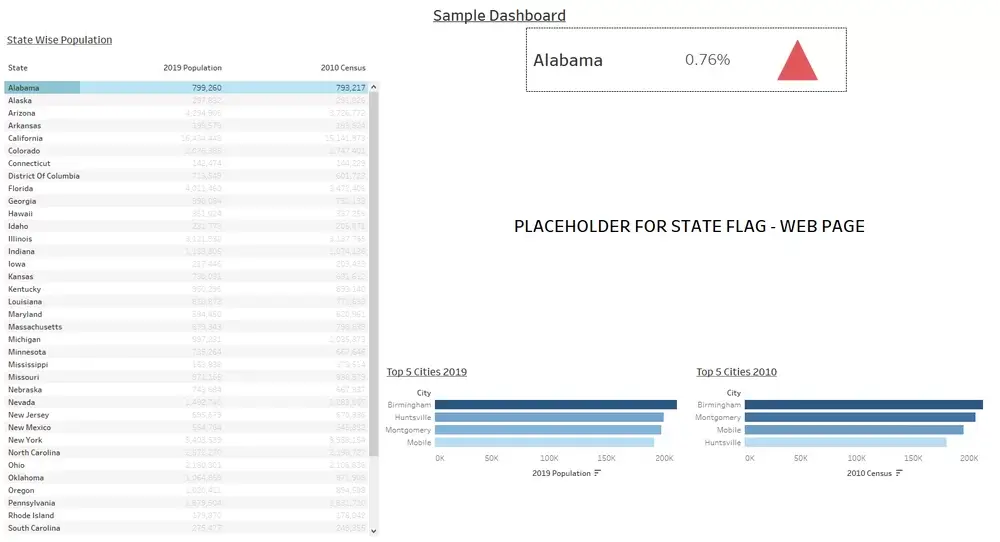
With the base ready, we can go to the next steps.
1) We will use the Web Page object in place of the existing text box. To start off, we can use any website for the base URL.
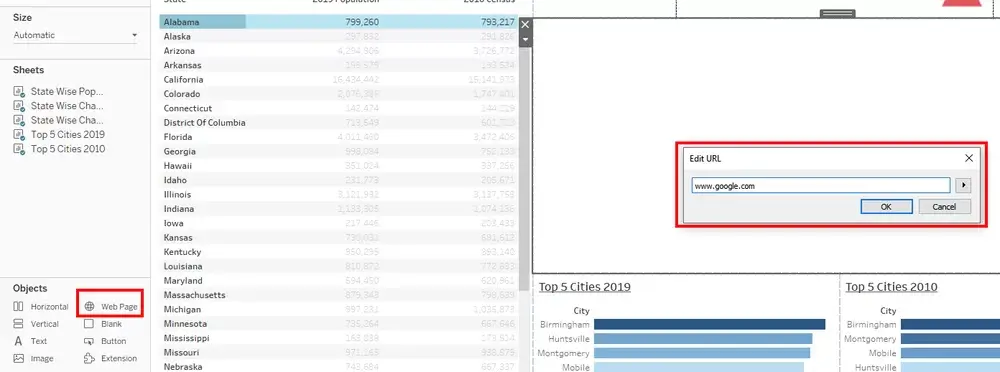
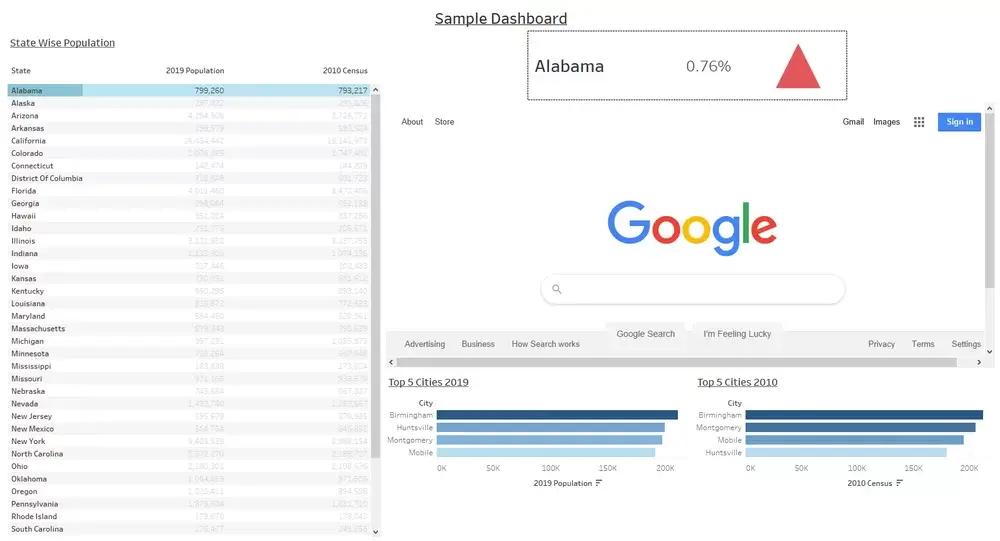
2) Now we need the URL of the flag as mentioned before. We will pick the Wikipedia flag link. https://en.wikipedia.org/wiki/Flags_of_the_U.S._states_and_territories#/media/File:Flag_of_Alabama.svg
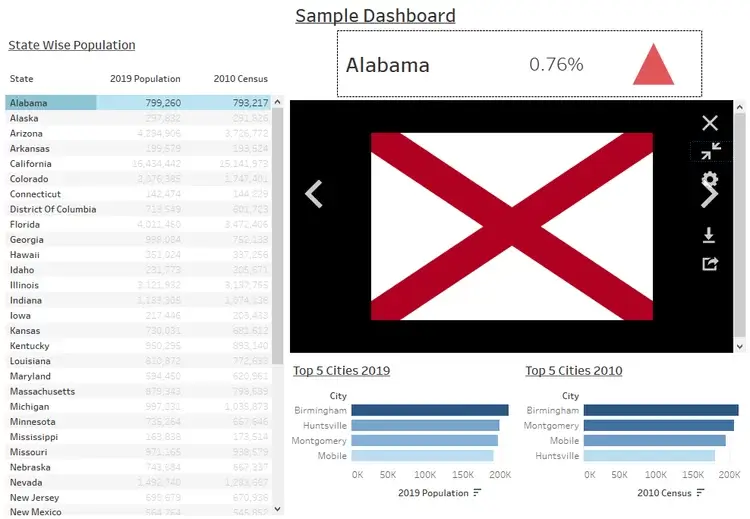
3) At this stage, the URL is static, we need to customize (dynamic) the URL for the selection. This has to be done using URL Dashboard Action.
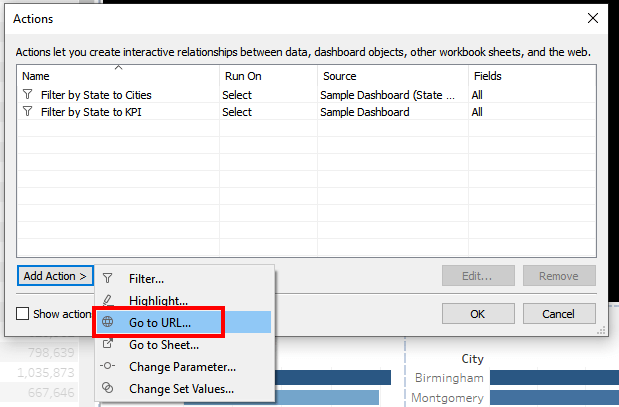
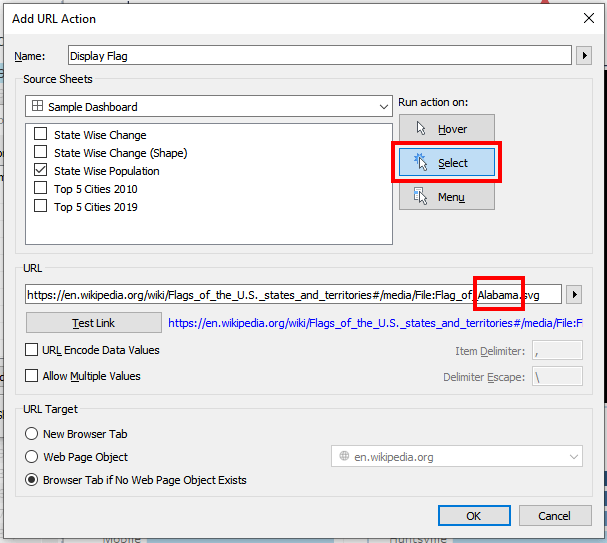
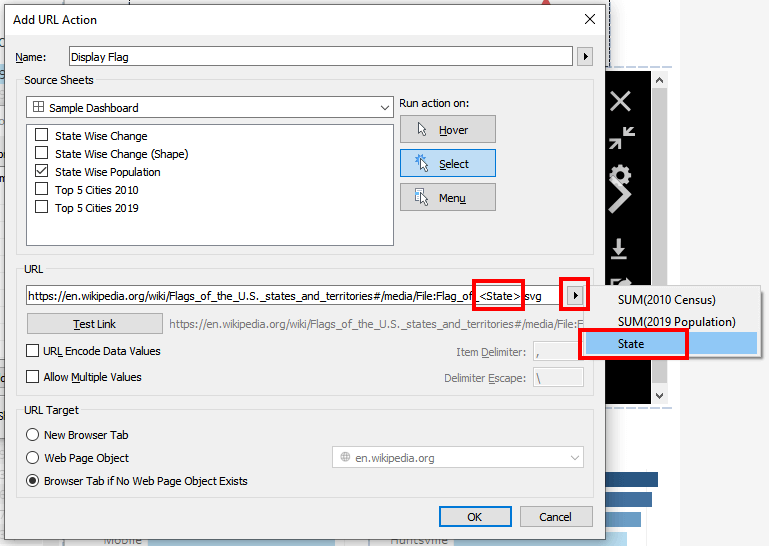
One very important thing to note is the absence of Reset Options for the URL Action
**We need to be conscious that the URL that we pick fits most (if not all) of the field members
4) When we test the URL action everything works fine except when the selection is revoked/removed. It is stuck on the previous selection.
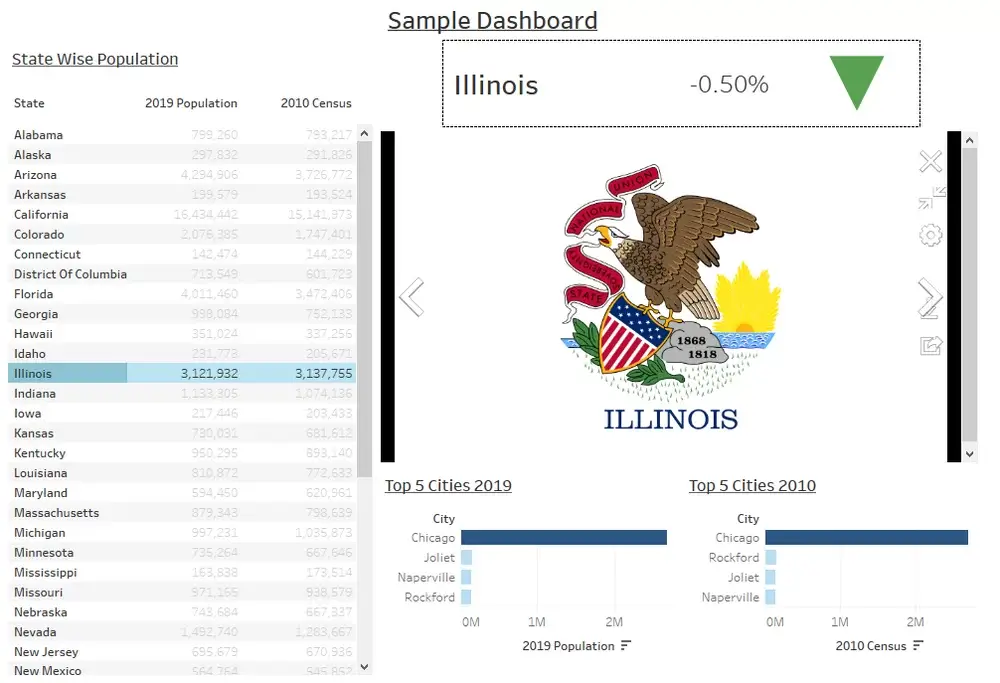
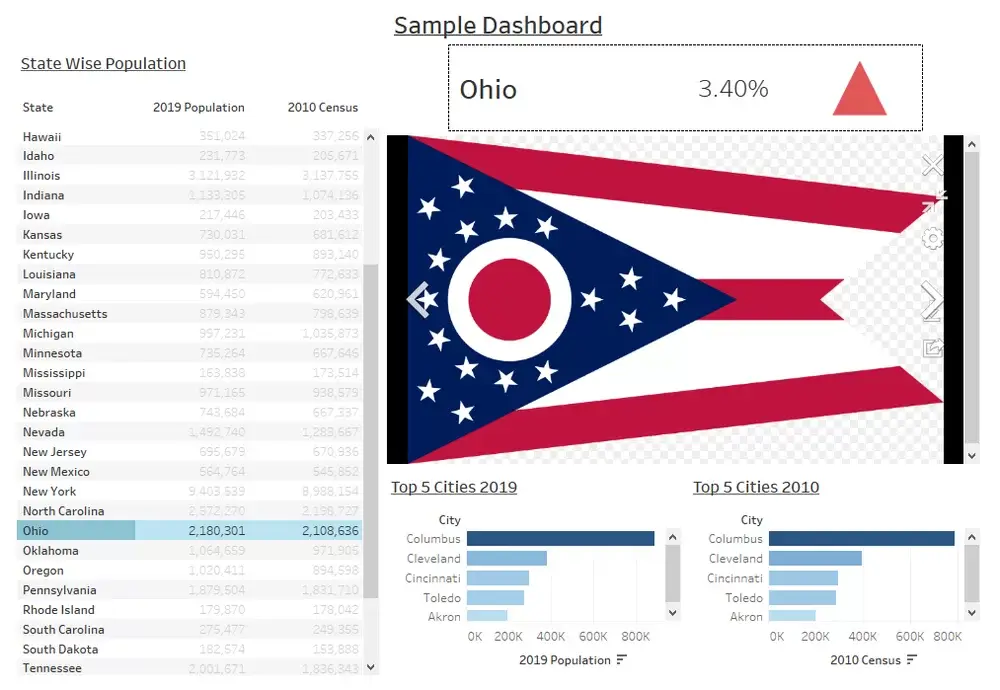
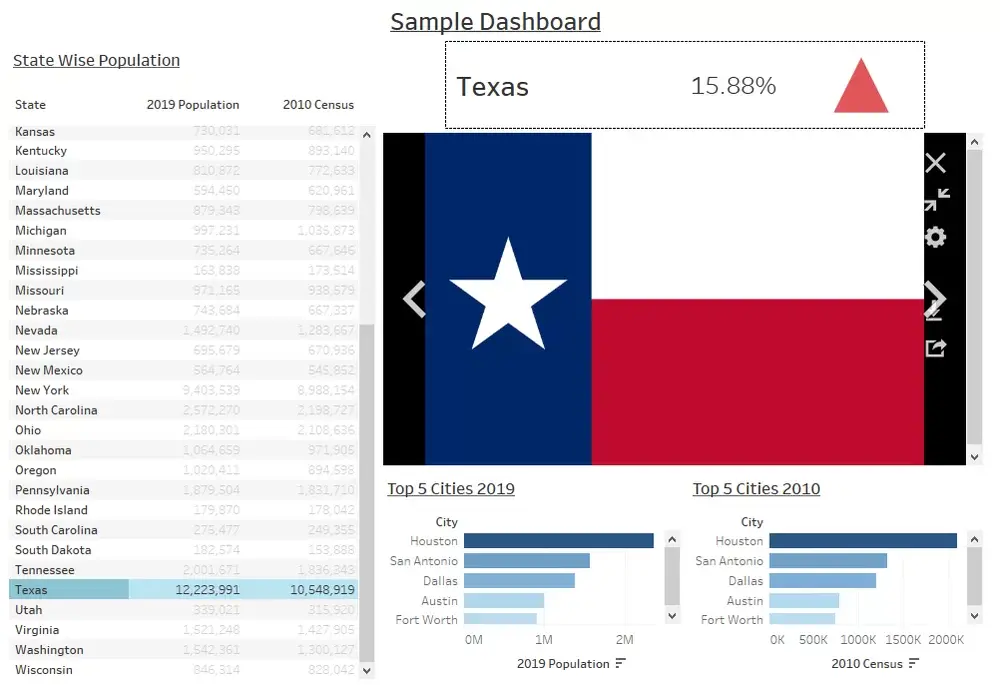
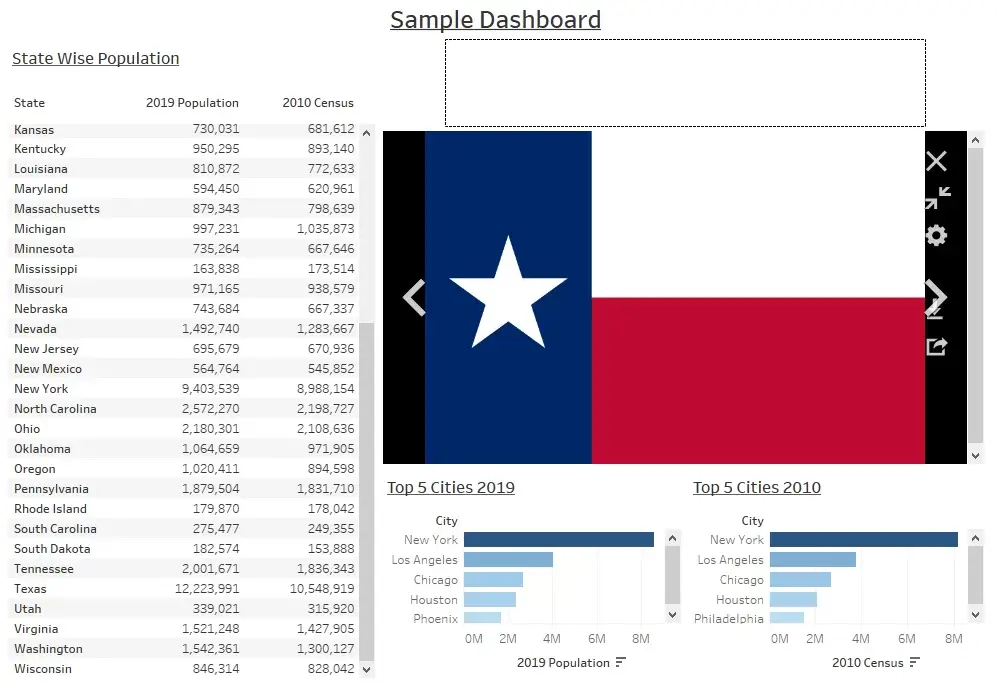
Here is where the requirement gets a little complicated. When the selection is removed by the user, the Web Page should reset. Since the reset option is not available, we will go with the BLANK approach i.e. when the selection is revoked, we will replace the Web Page with a blank worksheet through the overlap method.
** The only drawback is that the Web Page becomes non-interactive. So, this solution will not work for users who intend to use the Web Page with its built-in browser features.
5) This step is important. To achieve what we have mentioned in the previous step, we have to create another dataset. This dataset will be extremely small. We need only one row, one column of information. The need to use this new data source will be more evident in the future steps.
We can create a small file or we can write a simple SQL statement:

SELECT * FROM (VALUES (‘ABCD’)) FROM TABLE (TESTCOLUMN)
For this example, we are using a simple text file.
We need to make sure that this entry here does not match any of the members in the State column.
6) Creating a new worksheet in Tableau with this field. Here we need to make sure that the field is used on either Rows or Columns. Many of us make the mistake of using the field on the Text card of the Marks shelf, which will not solve our requirement.
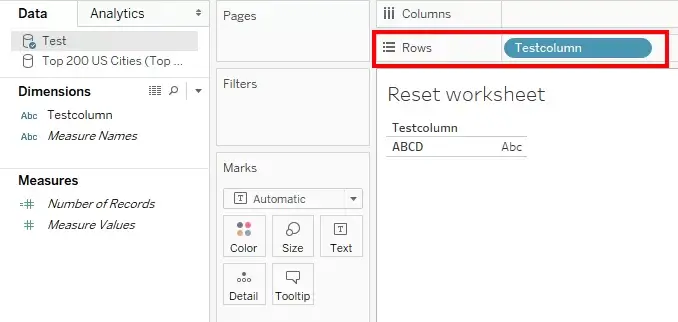
We can customize this sheet however we need, by adding a Calculated field like a message, converting the ‘Abc’ to a polygon or a shape, hiding the header of the Testcolumn, removing the row/column borders and dividers etc.
Exploring the Impact of Blank URL Actions on User Navigation
Leveraging URL Parameters for Dynamic Dashboard Interactivity
Troubleshooting Common Issues with URL Actions in Tableau
For now, we will use the sheet as is on the Dashboard.
7) When this new sheet is used on the Dashboard, it has to be floating, it has to cover the Web Page completely (superimpose), has to be fit in entirety and without the title.
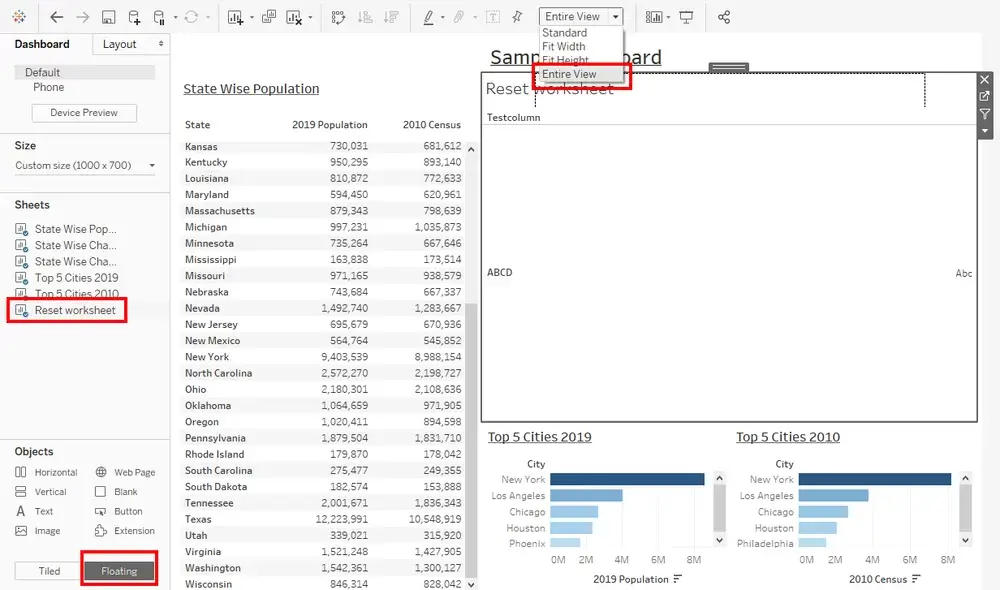
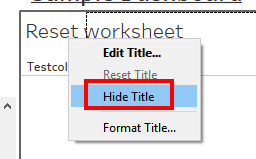
8) Now for the final step which knits all these together. We need to create a Dashboard Filter action which de-activates the Reset worksheet. When we say de-activate, it is actually nullifying action on this sheet.
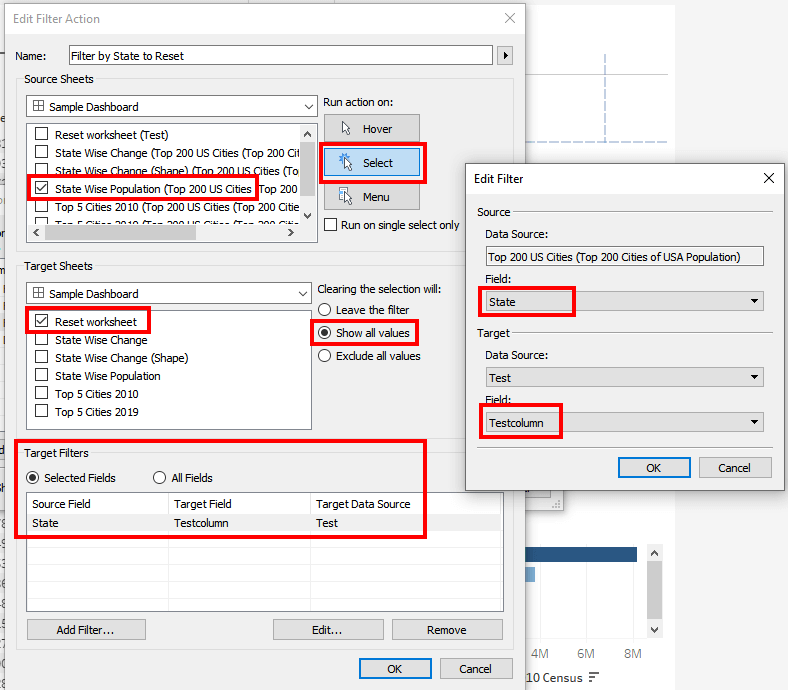
We are selecting only the Reset sheet in the target. But the second point to note is that we are creating a cross-database filter. That is reason to specify the Selected fields and mapping the State field from our main datasource with the Testcolumn field from the Test datasource.
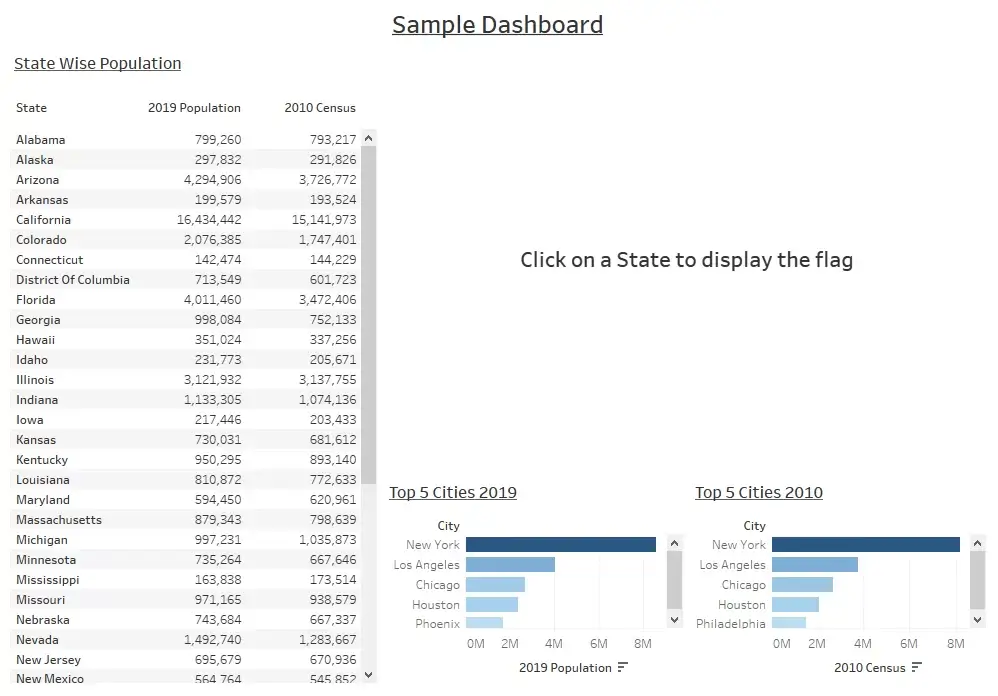
When we test, the dashboard selection works perfectly as desired.
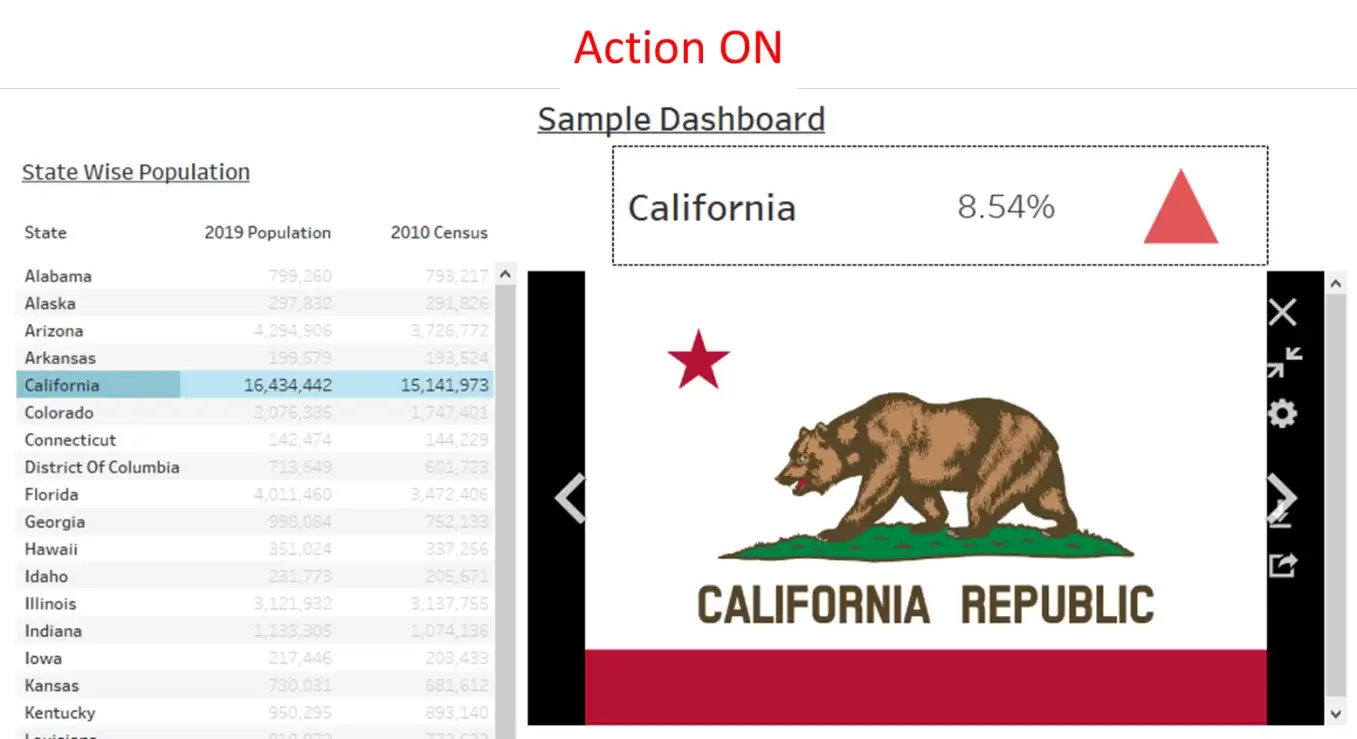
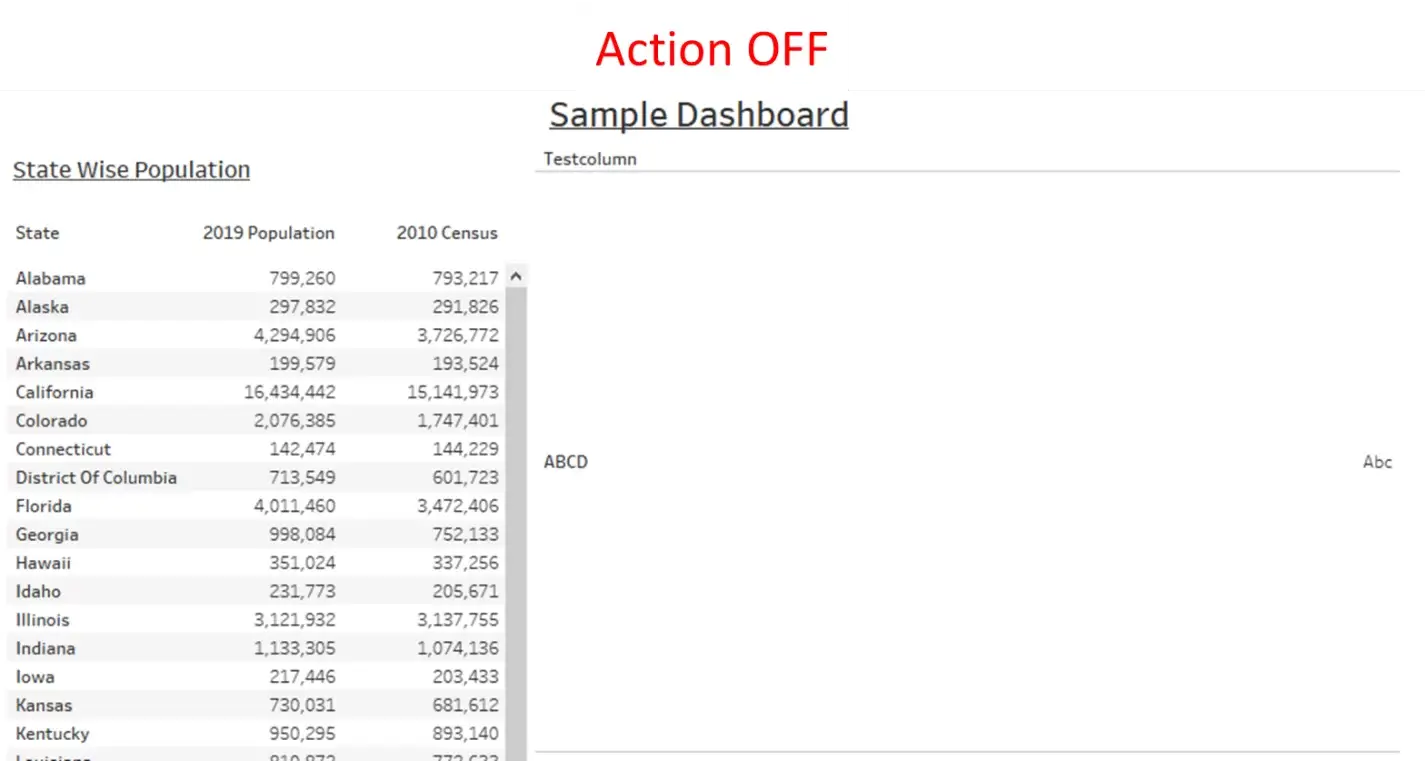
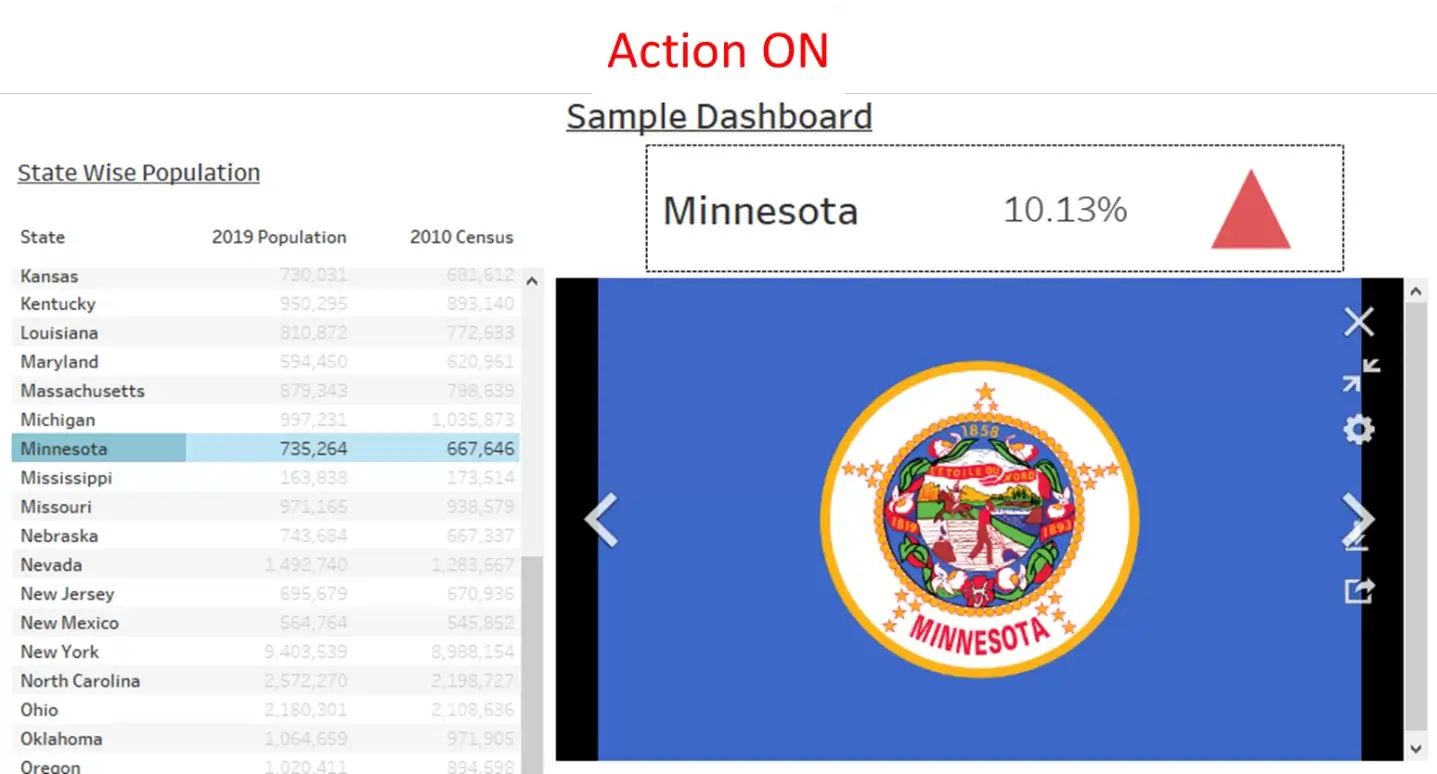
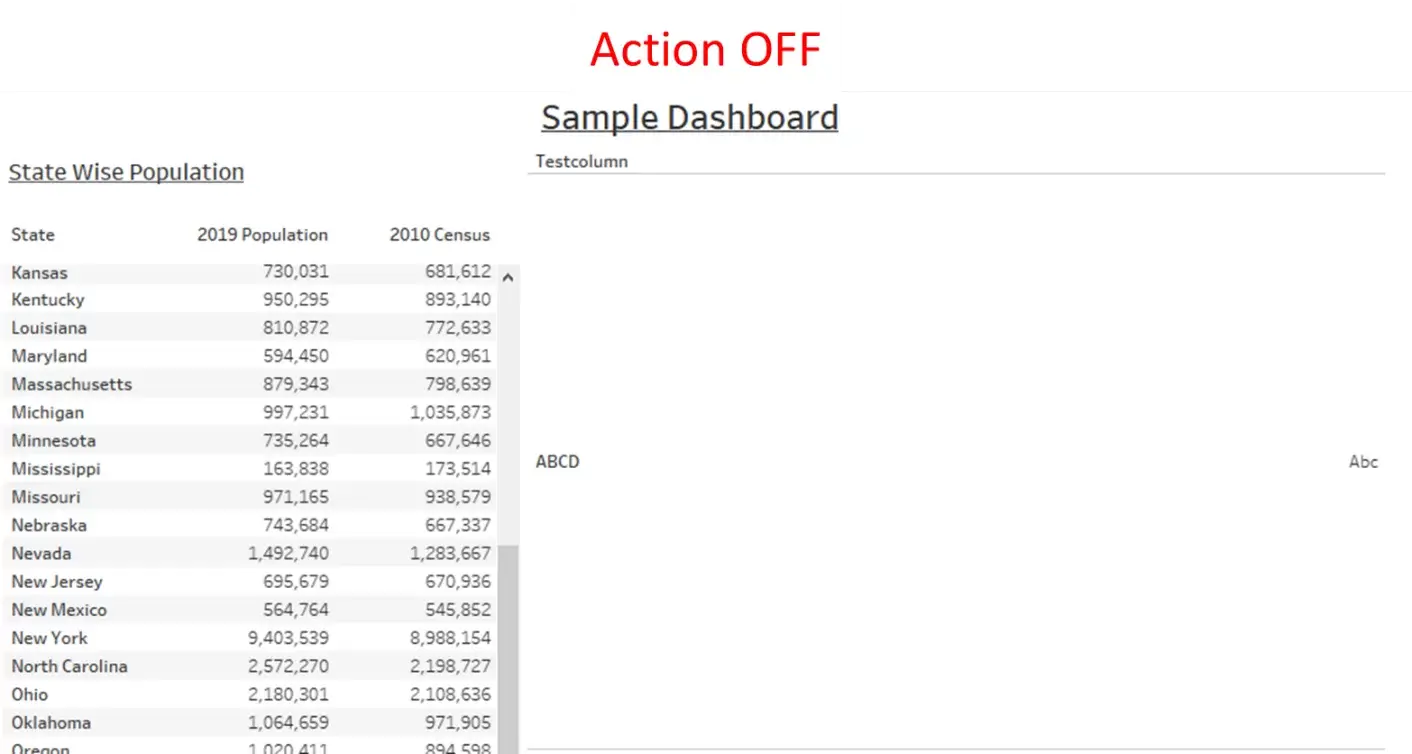
To analyze what is happening behind the scenes, we should have good understanding of Blends and Relationships. Here we are tricking Tableau to think that the State field and the Testcolumn field are exactly same. This way Tableau assumes that the members in the State field match the members in the Testcolumn field. But in this case, they don’t. So, when a selection is made on the State sheet, the Reset sheet will result in Null values thus making the sheet transparent and exposing what is underneath. When we remove the selection, the Reset sheet will come back to normal showing all the values initially represented.
With some formatting and making it more intuitive for the users, here is the final dashboard.


 Media Coverage
 Press Release
