In Part 1 of this blog, we explored key aspects of your Tableau Server environment and the challenges of migration. In this follow-up, we will outline the essential steps to execute a smooth transition to Tableau Cloud.
Ensuring a seamless transition from Tableau Server to Tableau Cloud requires a well-structured, phased approach that minimizes disruptions and maximizes efficiency.
Step 1
Setting Up the Cloud Environment
- Organizations should first sign up on Tableau Cloud with an appropriate plan based on requirements.
- After selecting the appropriate plan, the Tableau administrator must configure the cloud by providing necessary information such as the site name and customizing the site’s appearance and settings to align with the organization’s preferences.
Step 2
User’s and Group Migration
1. Steps to add Users/Groups either manually by inviting them through email or by importing a users’ list via CSV files:
- Log in to Tableau Cloud as a site administrator and navigate to the Users/Group tab.
- Click Add Users/New Group and enter the email addresses of the users you want to add or Click the More Actions button and select Import from CSV in case of importing multiple users.
- Choose the Site Role (Viewer, Explorer, or Creator) and click Add Users/ Create Group.
2. If the organization is using an Active Directory (AD), then admin can sync Users/Groups to Tableau Cloud using the Tableau Server Sync Client:
- Use the Tableau Sync Client to connect to your AD.
- Configure sync schedules that periodically sync AD group members with Tableau Cloud users/group.
- Users/Group in the AD groups will be automatically added to Tableau Cloud with their corresponding roles.
These methods suit both small teams and large enterprises. Manual or CSV options are ideal for smaller tasks, while Tableau sync client provides automation for larger-scale needs.
Configure Authentication
1. Single Sign-On (SSO): Configure SAML for SSO to allow users to log in using existing corporate credentials (via services like Okta, Azure AD, etc.).
2. Multi-Factor Authentication (MFA): Enforce MFA to increase security for your Tableau Cloud environment.
- Set up user groups to manage permissions more efficiently.
Set Up Tableau Bridge (For On-Premises Data)
To access on-premises data from Tableau Cloud, the administrator needs to install Tableau Bridge on the server and configure it to synchronize the on-premises data sources with Tableau Cloud, enabling live queries or scheduled data extract updates.
Link: Install the Windows Client – Tableau (Source: Tableau Documentation)
Step 3
Create or Migrate Projects
The administrator must ensure that projects are created or migrated in alignment with the project structure used in Tableau Server.
Note: Make sure to use unique names for projects and sub-projects and adhere to proper naming conventions when creating projects.
Establish Data Connections
After creating the project structure, migrate the data sources and verify their connectivity to ensure they contain accurate data and configurations as on the server.
- To further validate data source connectivity, users can publish both live and extract connections, then verify data freshness by either checking live connections or scheduling data extracts for extract connections.
Content Migration:
1. Data source
Manual:
- Download the data source from the server and open it in Tableau Desktop.
- Ensure you are signed in to Tableau Cloud
- Finally, publish the data source with authentication configuration as per the server
2. Workbooks
Manual:
- Download the workbook from the server and open it in Tableau Desktop
- Ensure you are signed in to Tableau Cloud, then update the data source to point to the correct location
- Finally, publish the workbook with the correct configuration to the desired location
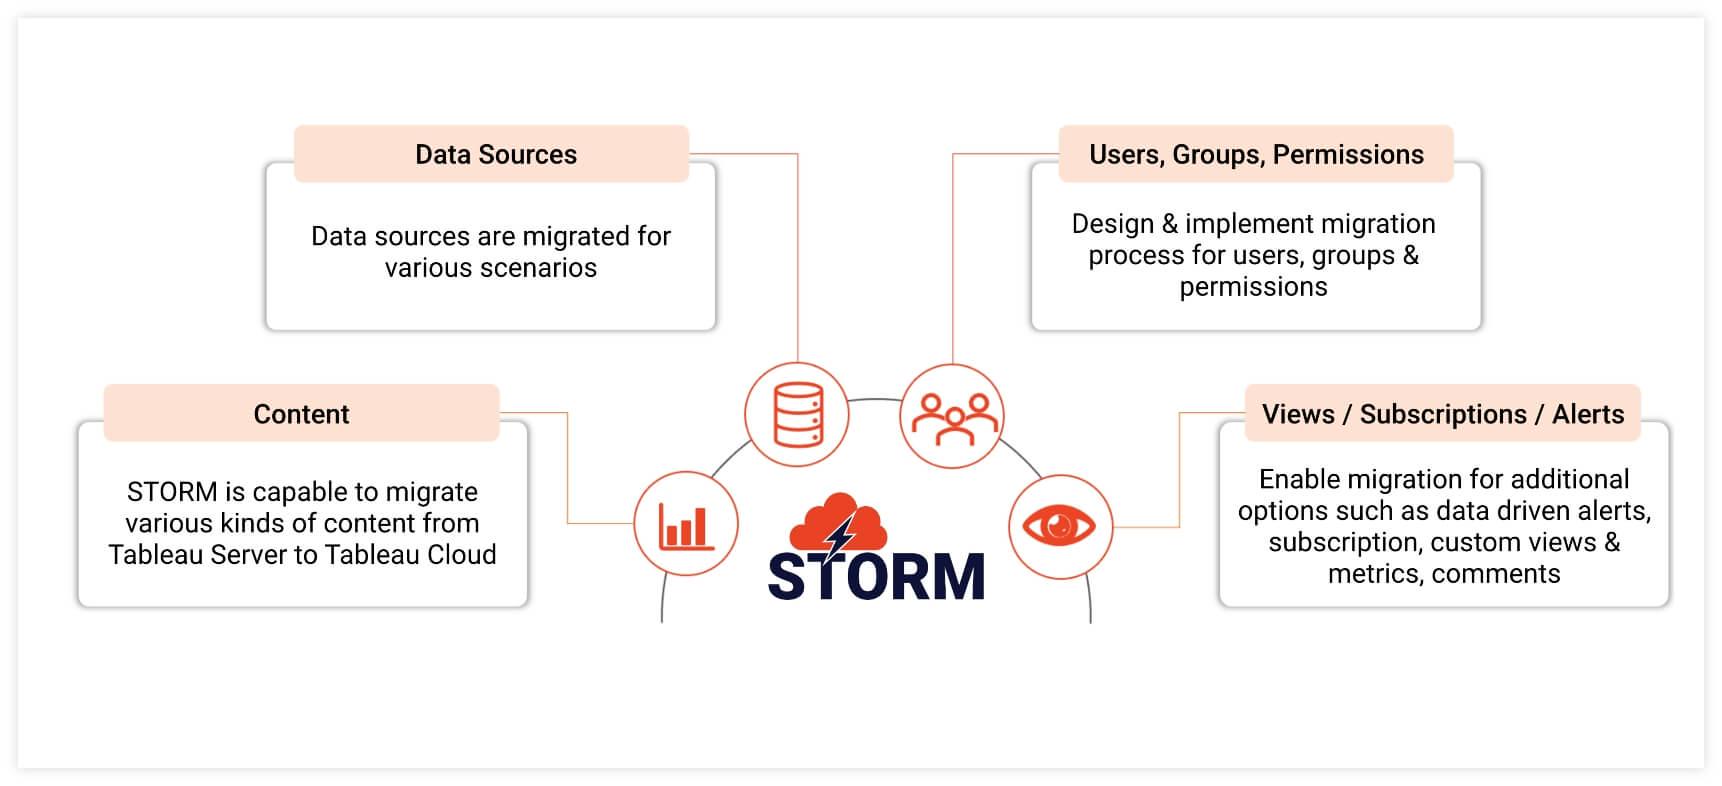
Note: Both Data Sources and Workbooks can also be migrated through automation using STORM, guaranteeing a smooth, efficient transition while preserving data accuracy and security.
Extract Refresh:
- Schedule data refreshes for the published data sources either manually or through automation by using STORM.
Subscriptions:
- Set up subscriptions to automatically deliver updated dashboards and reports to users on a regular schedule. Subscriptions can be created and scheduled manually or by using STORM, which allows creation of multiple subscriptions at once.
Permissions:
- Permissions are vital for controlling how users interact with all assets on Tableau Cloud. It’s essential to grant the right permissions to users and groups to ensure secure access, protect sensitive data, and maintain the integrity of your assets
- Manually migrating permissions can be time-consuming and error prone. However, using STORM streamlines the process, saving time and significantly reducing the risk of mistakes.
Note: There may be differences in permission capabilities between Server and Cloud due to version variations, STORM enables users to migrate permissions both by capability and template wise.
As part of the Tableau Server to Cloud transition, in addition to manual asset migration, the process can be streamlined using STORM—a robust migration tool that automates content migration, reduces manual effort, minimizes errors, and decreases downtime.
Step 4
Testing and Validation
- Confirm that all data connections are intact and functioning correctly.
- Ensure that data source credentials are up to date and properly configured.
- Verify that live data connections or extracts are configured appropriately.
- Check that dashboards and reports operate as intended and display data accurately.
- Validate that the formatting and styling match those of the original workbook.
- Ensure that all filters and parameters are functioning as expected.
- Confirm that user permissions for the workbook and its components are correctly set.
- Conduct a manual refresh of the extracts to ensure the process is completed successfully.
- Test any subscriptions to confirm they work as expected and adhere to the correct format.
- Verify that custom views and favorites are preserved and accessible to users.
From setting up the cloud environment to migrating users, configuring authentication, and establishing data connections, these steps help simplify the migration process. Testing and validation are crucial, and using automated tools like STORM significantly reduces errors while accelerating the migration process. As organizations shift to cloud-based solutions, adopting these best practices ensures data integrity, strengthens user access management, and enhances the overall Tableau Cloud experience. With thoughtful planning, you’ll achieve a seamless migration that equips your team with accurate, reliable insights.
Click here for Part One