Automating Webpage Screenshot Capture and PDF Generation with Python
Using Python to Take Screenshots of Webpages and Save as PDF Files
Step-by-Step Guide: Automating Webpage Screenshot and PDF Creation Using Python
A manual process of taking a screenshot of webpage and saving it as pdf is easy. First, browse the webpage url, then take a print screen and then sav that image as a pdf. But, imagine a scenario where you need to look at a report everyday which is hosted on server and save it for later comparison. It becomes a monotonous manual job to do.
Introduction to Webpage Screenshot Automation with Python
Setting Up Your Python Environment for Webpage Capture and PDF Generation
Writing Python Code to Capture Screenshots and Save as PDFs
Advanced Techniques and Tips for Webpage Screenshot Automation
The good news is, we have found a way to automate it. We can automate it using various scripting languages or different tools but in this blog, I will be using Python to automate the task.
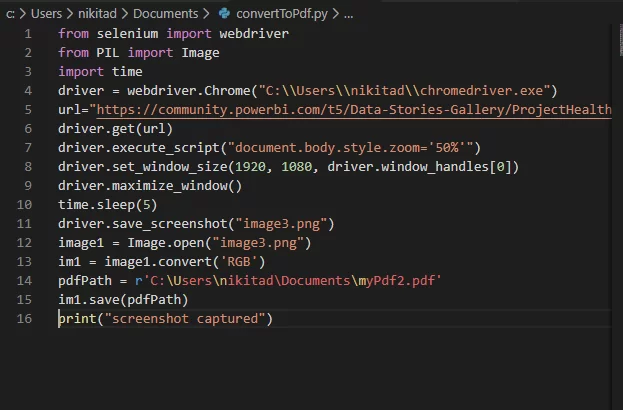
Following is the screenshot of the script that I have created which will go the webpage, take a screenshot and then save it as a pdf.
Before we dive deeper into each line of the script and what it does, lets discuss what are the prerequisites for running this script.
Installing Required Python Libraries for Web Scraping and PDF Generation
Writing Python Scripts to Navigate Webpages and Capture Screenshots
Saving Captured Screenshots as PDF Files Using Python
Handling Error Cases and Edge Scenarios in Webpage Screenshot Automation
Prerequisites:
- You should Python 3 installed into your machine.
- I am using Visual Studio code as my IDE to code, which is an open source IDE
- Download the right version of chromedriver.exe file. This version should be the same as the version of your Google Chrome. This is required since we will be using Chrome as our browser through the script.
- Pip install Selenium
- Pip install Pillow
- Pip install time
The Code:
Firstly, we will import all the packages that we will need in writing this script

Selenium WebDriver is the main component that communicates with the web browser. It supports most of the popular programming languages used by developers and testers, namely – Python, Java, C#, Ruby, and more. You can run Selenium with Python scripts for Firefox, Chrome, IE, etc. on different Operating Systems.
Pillow is a Python Imaging Library (PIL), which adds support for opening, manipulating, and saving images.
The Python time module provides many ways of representing time in code, such as objects, numbers, and strings.
After we have imported our modules, we can start the script.

Here, I am storing the path location where I have saved my Chrome driver. You will have to give the full path where you have downloaded your Chromedriver.exe file.

Next, I am giving the webpage url and storing it in “url” variable. I am then passing this variable to browse to the webpage through Driver.get() function. This will open the webpage. You can choose to directly pass the webpage url here instead of saving it into a variable.

These above steps are optional. In the first line, I am setting the zoom % to 50% to accommodate more content on the screen before taking its screenshot. The next lines are to maximize the screen and set the screen resolution, if your chrome browser by default doesn’t open a maximized screen.

Then, I am taking the screenshot of the page using save_screenshot() function. This line saves the screenshot in the default location with the name specified by the user in the function. Before, taking the screenshot I suspend executing the script for 5 seconds to let the page load incase it doesn’t load instantaneously. Next, I open the image and store it into another variable.

Next, I convert this .png image into a pdf file and provide a path location to save it.
Lastly, I give a print command which specifies if the script is finished running and saved our pdf file in the specified location.
Now, lets extend the above problem statement into business scenario. Suppose that senior management in your organization look at particular performance reports on the server. But they do not have time to navigate to the website and look at certain reports that get published every day. Instead, they want an email everyday with the screenshot of this report sent to them everyday in an email attachment.
How to take screenshot from the webpage and send as an email attachment
To solve this business scenario, I am using Alteryx as the main tool. Once Alteryx is opened, I bring in the Text Input tool onto the Canvas. In the Text Input tool, add the url for the published report. In this case, I am using a Text Input tool, but you can also use an excel sheet as your input which can have multiple urls.
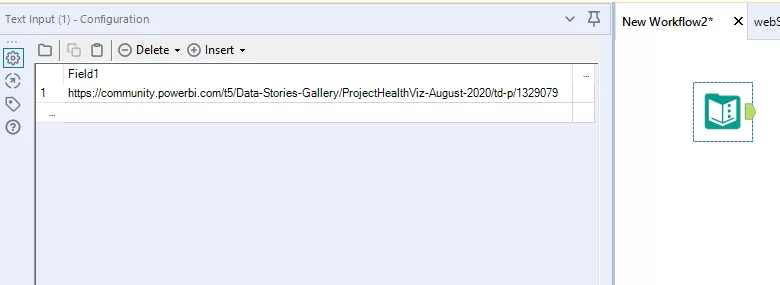
Now I will add Python tool from Developer menu to the Canvas after the input. I will use the similar code in this tool that we designed in our earlier section with some small changes.
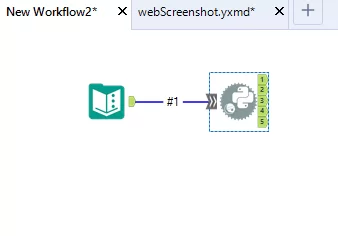
Once the Python tool is added to the canvas, open the configuration window on the left side of the Canvas.This is where I will be writing the Python code to execute. You will observe Python tool already imports the AYX library which is the Alteryx library for writing Python code in Alteryx.
I will now install the necessary packages using Package.installPackages([‘pandas’,’numpy’])

Next, I will repurpose our Python code from our earlier section and paste it in the Configuration window.
After, I write the code, I will make one change in the code which is to read our text input URL as highlighted in the picture below.
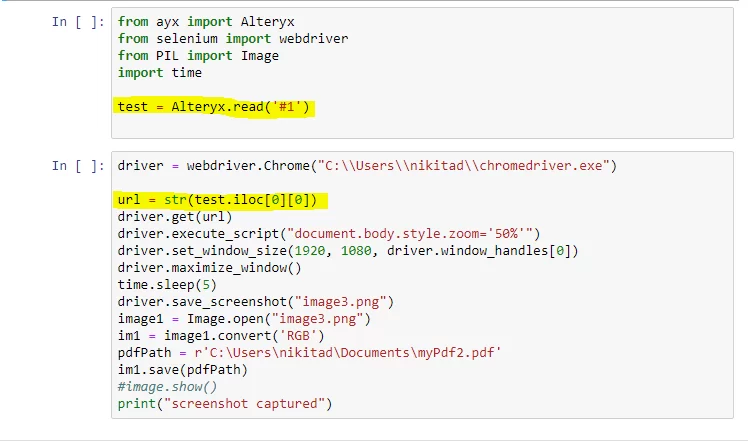
If you are using an excel input with multiple URLs, then you will have to iterate over the rows in excel to read and process the URL one after the other.
Now, I will add the Email tool from the Reporting tab on the Canvas and connect with the output of Python tool. I will configure the Email tool by adding the SMTP, FROM and TO email ids of the sender and recipients. In the Attachments sections, navigate to the path where the image gets saved after running the Python script. This will attach the image in the form of an attachment in the email.
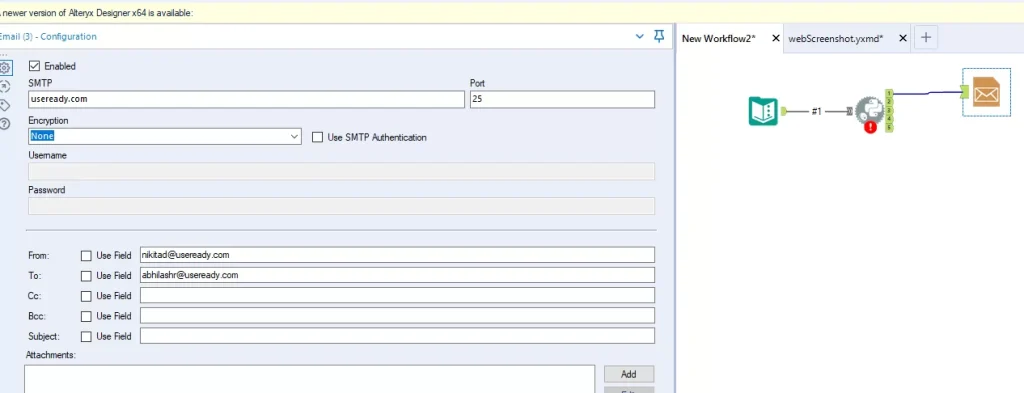
This completes the workflow. Now to send it the email every day, we can schedule this workflow to run daily and email will be sent every time this workflow runs.


