Introduction to Alteryx and PostgreSQL Integration
Alteryx and PostgreSQL Connection
Building Workflows for Alteryx and PostgreSQL
Connecting data sources to Alteryx is crucial for unlocking the full power of data analytics. While building workflows may seem straightforward, seamlessly publishing and sharing reusable connections on the Alteryx Gallery adds a layer of complexity to the task. In this blog, we’ll walk you through the steps to connect Alteryx Designer to PostgreSQL, building an end-to-end workflow. Plus, we’ll look at how to create a sharable Gallery Data Connection to enable smooth collaboration without exposing database credentials.
Read along as we explore the technical nitty-gritty behind data connectivity and accessibility in Alteryx.
Sharing Alteryx Workflows in the Gallery
Optimizing Analytics with Alteryx and PostgreSQL
Overview of Alteryx and PostgreSQL Integration
Part 1: Connecting Alteryx to PostgreSQL
Step 1: Install Alteryx and PostgreSQL Driver
- Ensure you have Alteryx Designer and PostgreSQL Driver installed on your machine.
- Use the below link to download PostgreSQL Driver. https://help.alteryx.com/20231/designer/postgresql
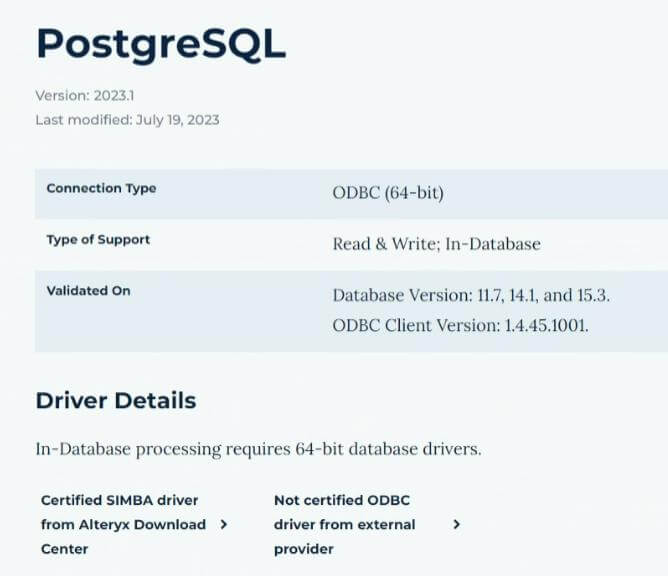
Step 2: Configure the Input Data Tool
- Open a new workflow in Alteryx Designer and drag & drop the “Input Data” tool from the toolbar onto the workflow canvas.
- Click on the “Connect a file or Database” drop-down and select “Data Sources”.
- Choose “PostgreSQL” from the list of available databases.

Step 3: Enter PostgreSQL Connection Details
Provide the necessary connection details:
- Click on the “ODBC Admin” under the PostgreSQL Connection tab.
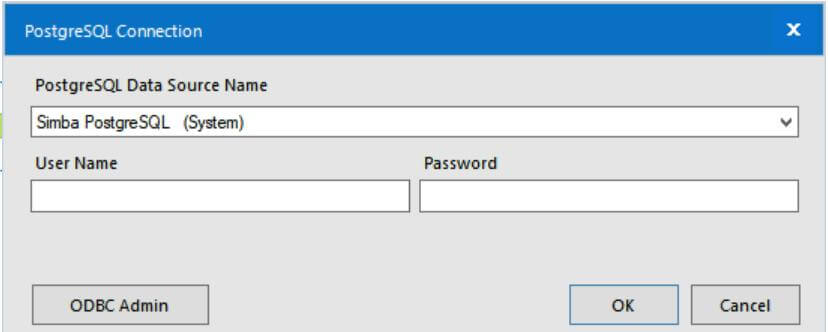
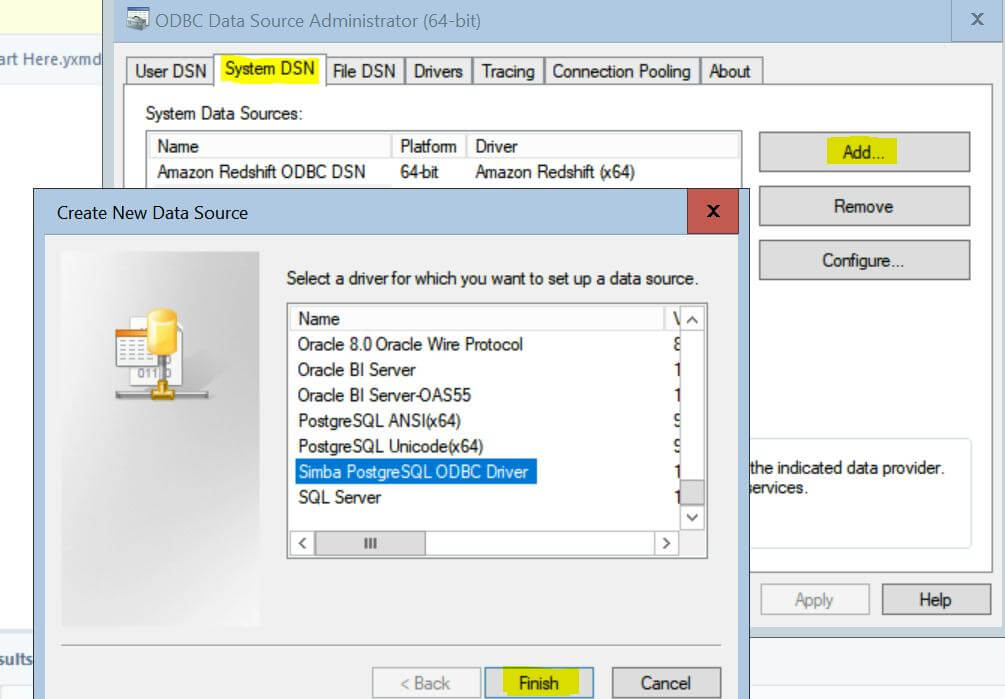
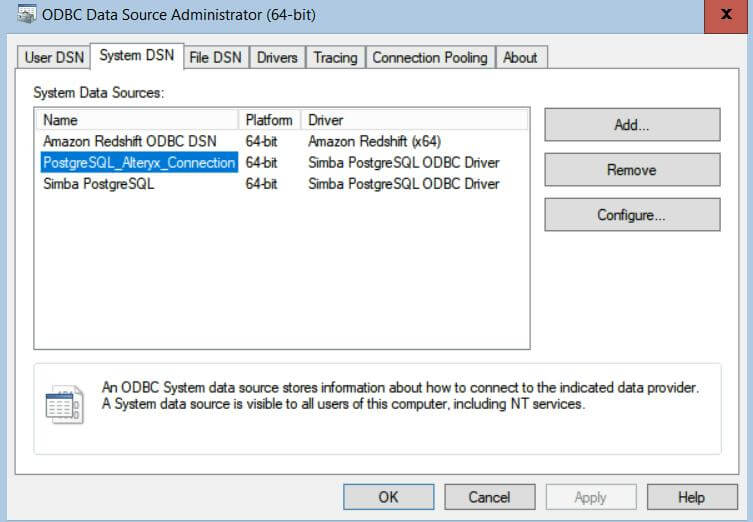
- Select “System DNS” and then click “Add” and then select “Simba PostgreSQL ODBC Driver” then click on Finish.
- A new Window will pop up for connection settings (Fig-5). Enter the following details.
- Data Source Name: A descriptive name for the connection.
- Server: Enter the Server Name.
- Port: Enter the Port number.
- Database: Enter the PostgreSQL database name.
- Username and Password: PostgreSQL login credentials.
- Click “Test Connection” to ensure the details are accurate. If successful, click “OK” to close the window.
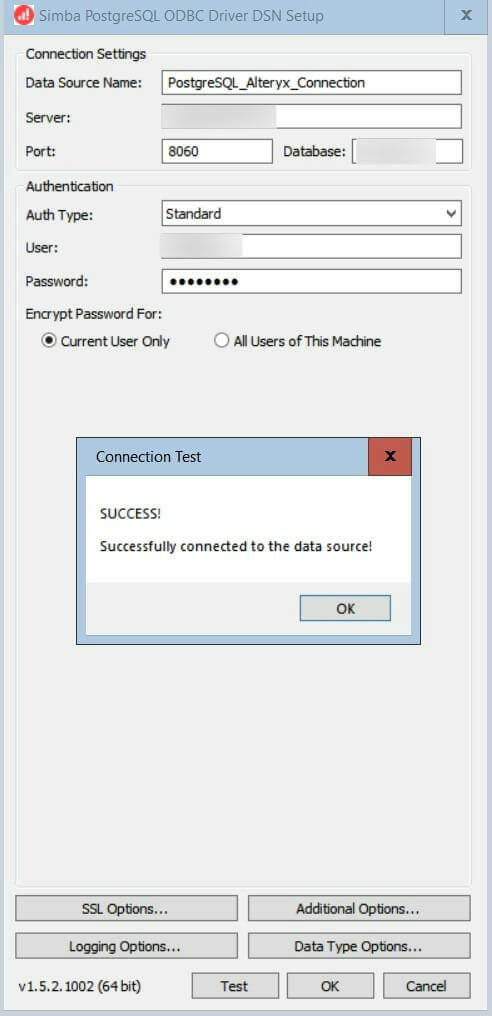
- Select the New Data Source “PostgreSQL_Alteryx_Connection” and click OK.
Step 4: Select the Desired Table
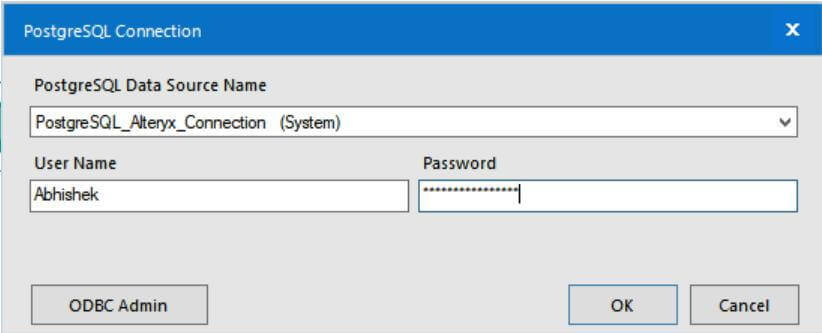
- Enter your credentials (use the same credential as used in Fig-5).
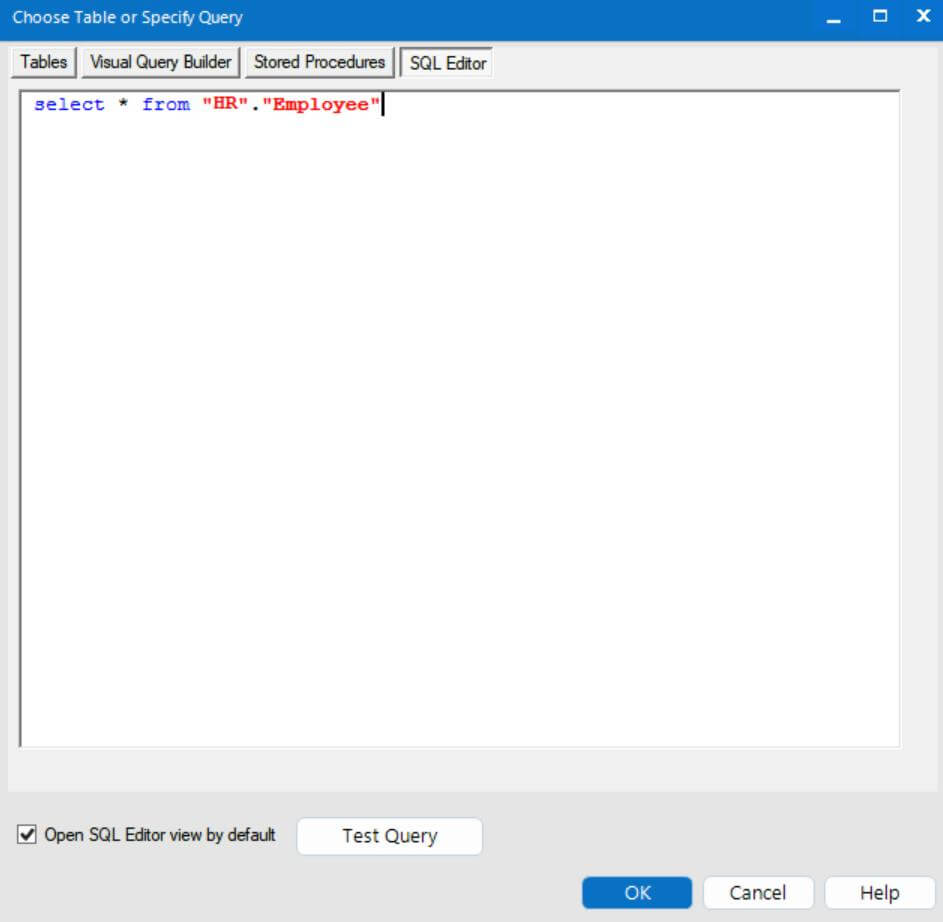
- In the Input Data tool configuration window, choose the table or write SQL Query for the table you want to work with.
- Click on Test Query then click OK.
- Below is the sample workflow.

Step 5: Publish the Workflow on Alteryx Gallery
- Click on the File and select save as -> Alteryx Server and then select the server on which you want to publish.
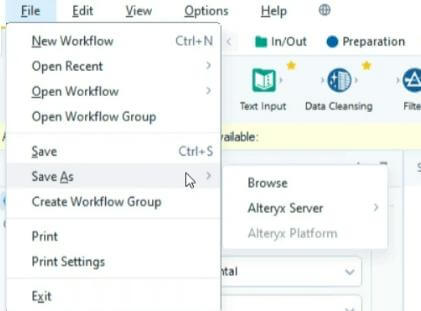
- Click on save to publish on Alteryx Gallery.
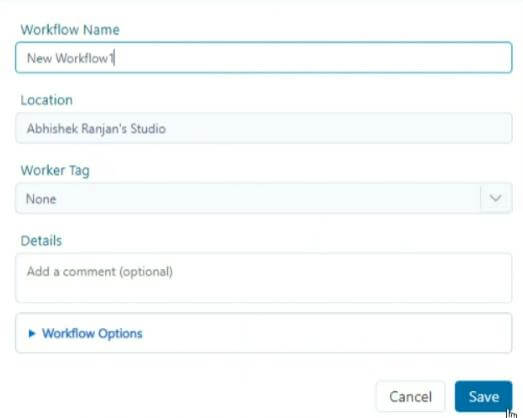
- When we try to publish it, we faced the below error.
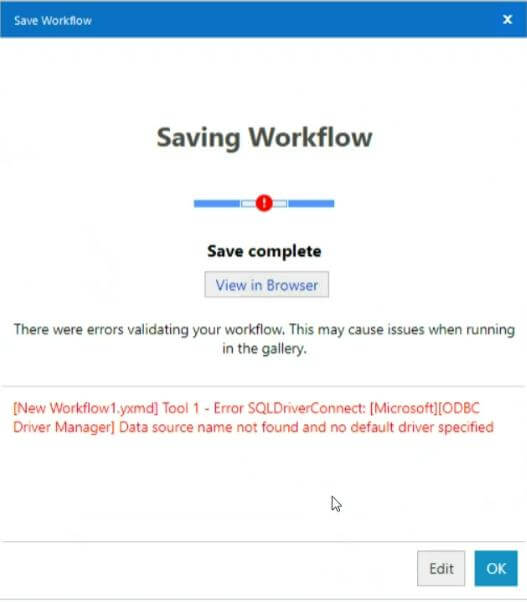
Note:
- To resolve this error, we need to make a data connection on Alteryx Gallery. To achieve this, follow the below steps.
- If you have to publish your workflow on the Alteryx Gallery, then download the PostgreSQL Driver and create a data connection on the Alteryx Gallery instead of Alteryx Designer.
Part 2: Creating and Sharing a Gallery Data Connection
Alteryx allows users to create and share data connections via Alteryx Gallery, promoting collaboration and streamlined data access.
Step 1: Create a Data Connection
- In Alteryx Gallery, click on the “Data Connection” and select “Add Data Connection.”

- Under “Data Connections,” select connection type “Other” and provide the Connection Name.
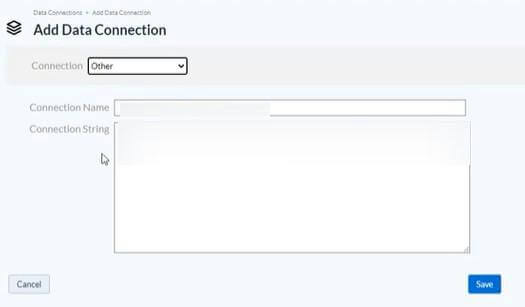
- Enter the Connection String in the below format:
odbc:DRIVER={Simba PostgreSQL ODBC Driver};UID={User Name};PWD=Password;DATABASE={Database Name};SERVER={Server Name};PORT={Port Number}- Click on the Save.
Step 2: Share the Connection
- Click on the connection that you want to share with other users.
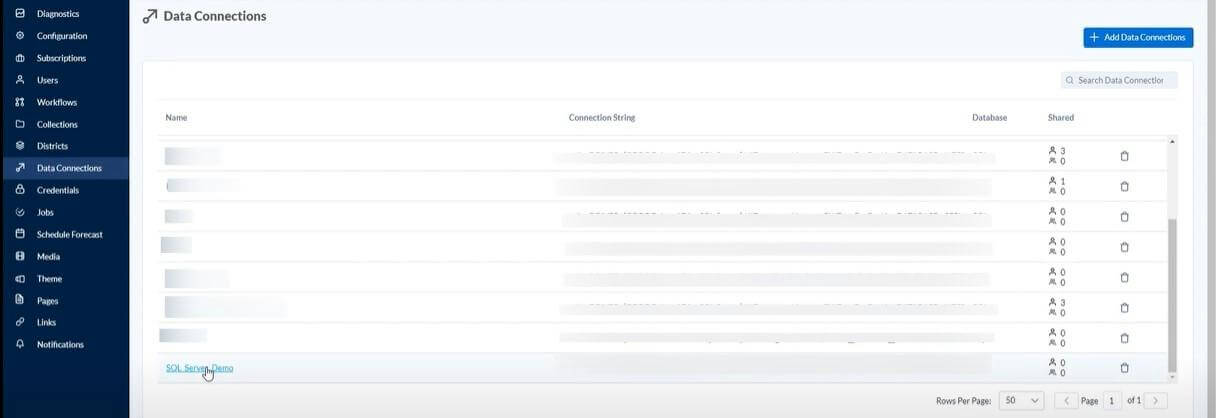
- Select the “+ Add User” and enter the username then click on the “Add”.

- Now go to the Alteryx Designer bring the “Input Data” tool to the canvas and click on the “Connect a file or Database” drop-down.
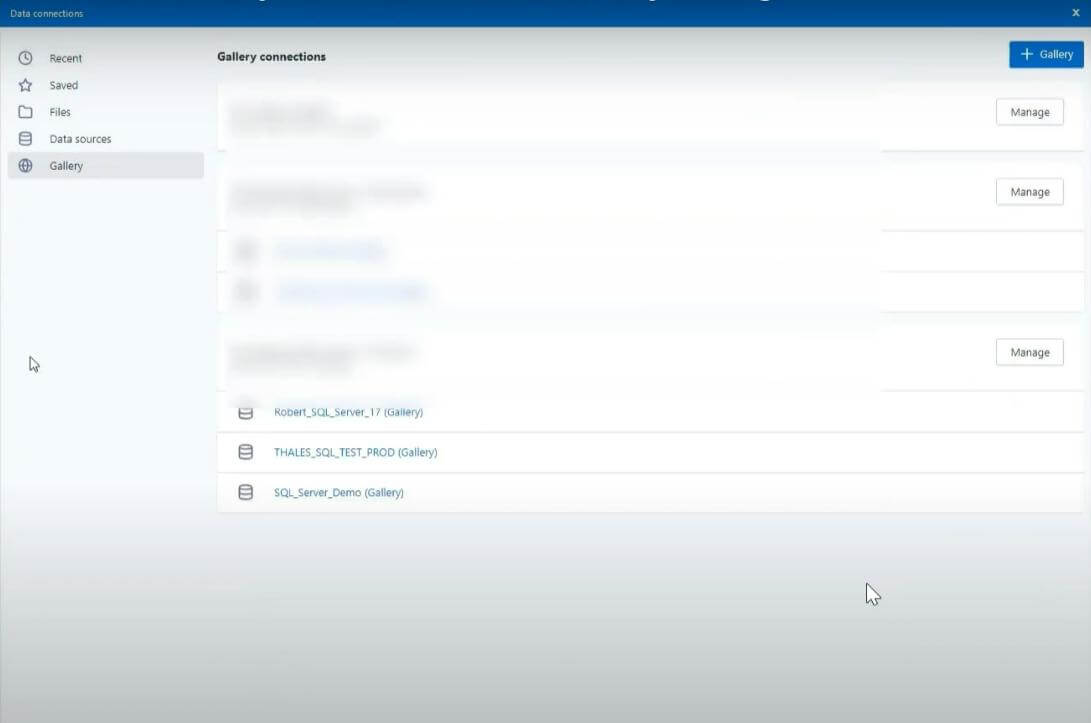
- Select the Gallery from the “Data Connection” tab. You can choose the desired data connection from the list.
Alteryx and PostgreSQL Guide for Workflow Creation
Alteryx and PostgreSQL: Tips and Best Practices
Alteryx Designer and PostgreSQL Driver
Creating and sharing database connections on the Alteryx Gallery streamlines workflows for teams by providing easy access to data sources without sharing sensitive credentials. As you incorporate more diverse data and users into your Alteryx ecosystem, be sure to leverage the Gallery for its security and collaboration capabilities.
With the power of Alteryx and PostgreSQL combined, the analytics possibilities are endless. Try out these steps yourself to see how publishing connections can take your workflows to the next level. And as always, happy analyzing!


 Media Coverage
 Press Release