 Media Coverage
 Press Release
Enhancing Data Connectivity with Tableau Bridge Pooling
Step-by-Step Guide to Tableau Bridge Pooling Configuration
In this three-part series on Tableau Bridge, so far we have covered, Understanding the Need for Tableau Bridge and Capacity Planning and Installation and Configuration of Tableau Bridge. In this final instalment, we’ll delve into Bridge Pooling on Tableau Cloud.
If in case you’ve missed our previous blogs or want to get some additional context, you can find them here: Part 1 and Part 2.

Introduction to Tableau Bridge Pooling
Benefits of Configuring Tableau Bridge Pooling
Best Practices for Tableau Bridge Pooling
Setting Up Tableau Bridge Pooling: A Step-by-Step Process
Common Challenges and Solutions in Tableau Bridge Pooling
Optimizing Data Access with Tableau Bridge Pooling Configuration
What is Pool in Tableau Cloud?
A pool in Tableau Cloud is a group of Bridge clients designed for load balancing. It allows admins to maintain data freshness and security by mapping pools to data network domains. Multiple Bridge clients can be assigned to a single pool, helping distribute refresh jobs among available clients within the pool.
Refresh tasks are assigned to a random client in the pool. If the assigned client fails to refresh the extract, the job is automatically rerouted to another client – no manual intervention required.
Quick note, currently, pooling doesn’t support data sources using Bridge (Legacy) Schedule
Pre-Checks Before Configuring Pool
Before you proceed with creating and configuring pools, perform a few checks to avoid future issues.
- Make sure the client is installed and running as a service.
- The account authenticated into the client has a tableau cloud site admin role.
- If there are file-based data sources, ensure all the bridge in the pool are running v2021.4.3 or later.
Create New Pools
This section will guide you through creating a new pool on Tableau Cloud:
- Login to Tableau Cloud using site admin account.
- Navigate to Settings>Bridge tab.
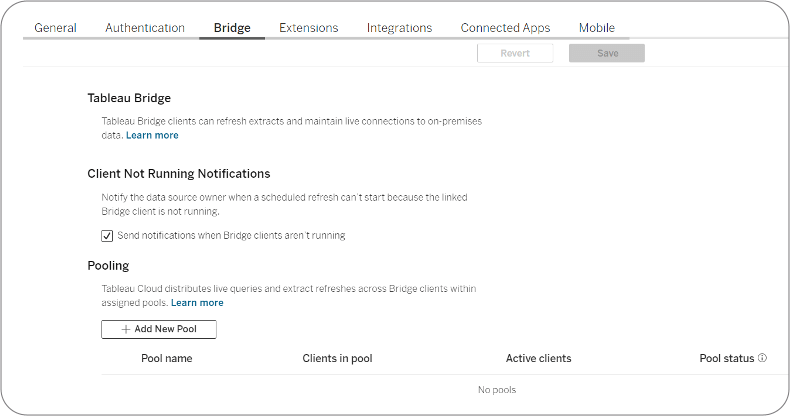
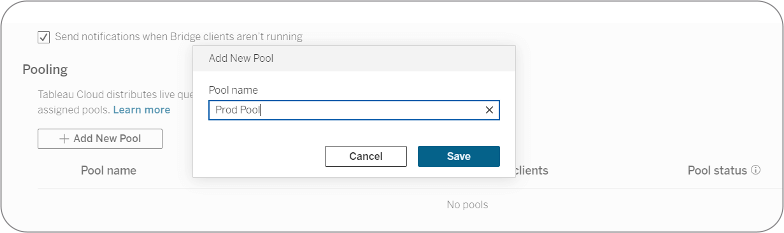
- Under Pooling, Click Add New Pool button.
- Enter the pool name in the dialog box and click Save.
- Create as many pools as needed by repeating the same steps.
Domain Mapping for Pools
After the required pools are created, the next step is to specify a domain for each pool to establish the connection. You need to specify the domains of the private network where client access needs to be enabled. These domains correspond to the database and files network locations.
Both domain names and IPv4 addresses can be added to the allowlist. It is recommended to use the same connection details that are used while creating the data source on Tableau. If in case, the exact connection name is not known, you can assign the clients to the Default pool as a temporary measure.
Follow the steps below to map a domain to a pool:
Step 1
On the Settings>Bridge tab, scroll to the Private Network Allowlist section.
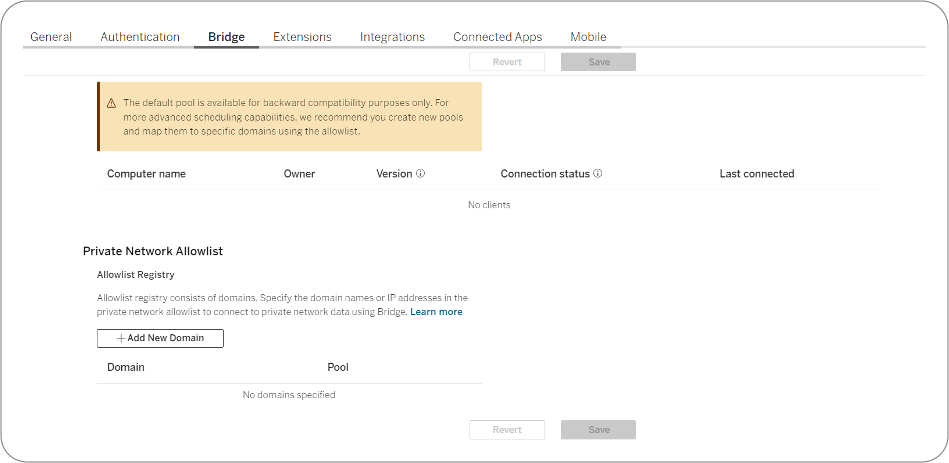
Step 2
Click on “+Add New Domain” button.
Step 3
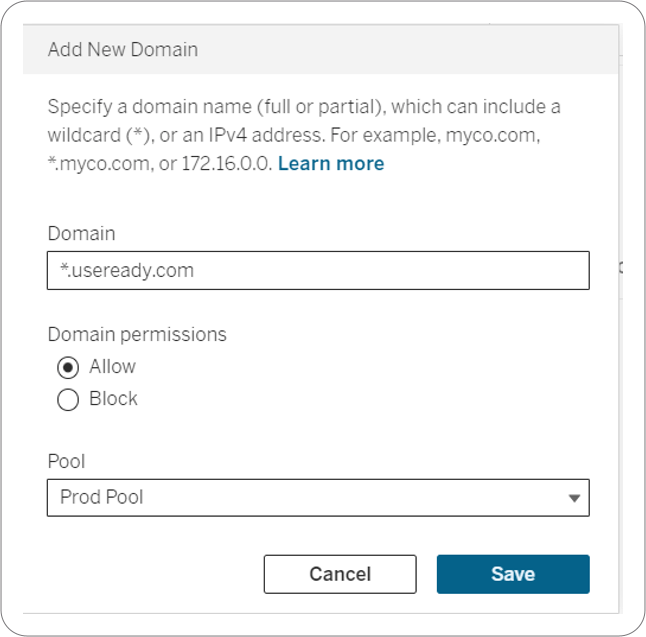
In the Domain dialog box, enter the connection details (domain name or IP address).
Step 4
Under Domain Permissions, select Allow button.
Step 5
Under Pool, select the pool name which is scoped to access the URI specified in step 3.
Step 6
Click Save.
Step 7
Repeat the above steps for each domain that needs to be whitelisted.
Adding Clients to a Pool
Once the domains are added to the allowlist, the next step is to add client to the pool. The steps are described below:
Step 1
On the Settings>Bridge Tab, scroll to the Unassigned Clients section and navigate to the client to assign to a pool.
Step 2
Click on the edit button for that bridge and select the pool name.
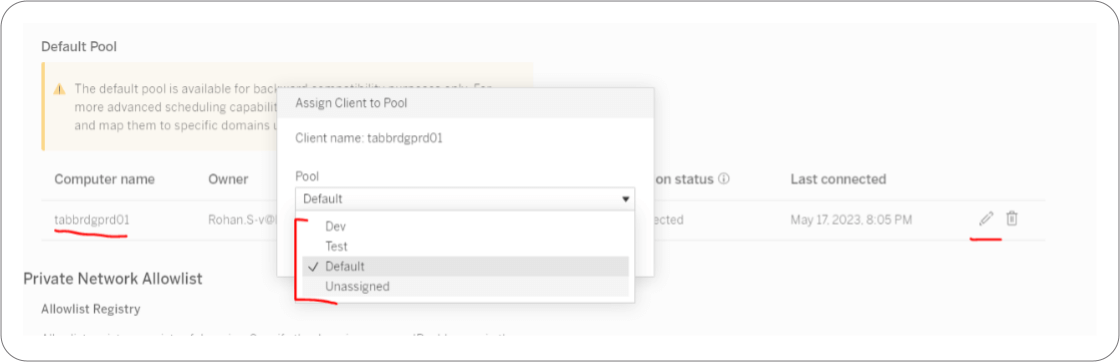
Step 3
Multiple bridges can be moved to single pool, but one bridge cannot be part of multiple pools.
This completes the creation and configuration of pools on Tableau Cloud. In this blog series we have comprehensively covered Tableau Bridge deployment, from the planning phase to configuration. We hope this helps you set up Tableau Bridge smoothly!
Click here for Part 1
Click here for Part 2