Installing Tableau Bridge: Your Complete Tutorial
Effortless Installation of Tableau Bridge: A Step-by-Step Guide

In our previous blog, we explored Tableau Bridge deployment planning. If you haven’t already, be sure to check out Bridging the Gap for a smooth setup.
Once your plan is in place, the next step is to install and configure Bridge to establish a reliable connection between your Tableau Cloud data sources and on-premises servers. In this blog, we will guide you through installing Bridge on a Windows machine.
What is Tableau Bridge and Why Do You Need It?
Preparing for Tableau Bridge Installation
Step-by-Step Installation Guide for Tableau Bridge
Understanding the Role of Tableau Bridge
System Requirements and Prerequisites for Tableau Bridge Installation
Detailed Installation Steps for Tableau Bridge
Pre-Installation Checks
Before installing the bridge, here are a few pre-installation preparations that should be done to ensure smooth deployment.
- Network Access – The bridge should be able to access the database in the private network that’s planned to be used on tableau cloud. Besides, it should be able to make an outbound connection to the internet to access tableau cloud.
- Database Driver – Ensure that all necessary database drivers are installed on the machine where the bridge will be installed.
- System Requirements – Double-check that your system configuration meets Tableau’s recommendations and can handle peak loads.
- Ports – Check that the Tableau Bridge uses port 443 to make connection to tableau cloud and port 80 for certification validation.
- The user logging in must be a local admin or have admin privilege on the machine to run bridge client.
- The user installing Bridge needs access to the Windows Vault specific to their account.
- Ensure your machine can access Tableau Cloud.
Installation
Once the pre-installation checks are complete, you can follow the steps detailed below to install the bridge. Please note that you do not need a Tableau product key to install or use the client.
- Download the installer from the Product Downloads and Release Notes page on the Tableau website. It is recommended to download the latest version listed on the page to take advantage of the latest security and feature updates.
- Run the installer.
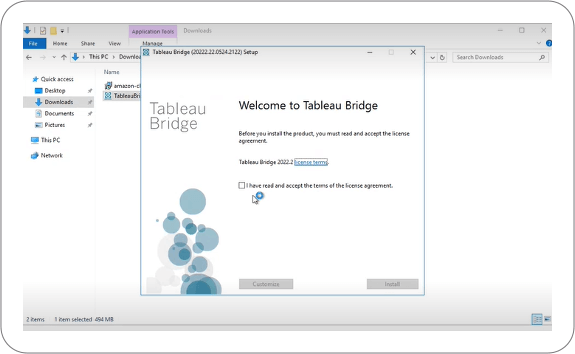
- Accept the license agreement to continue.
- (Optional) Customize the installation by clicking Customize. You can change any of the following options:
- Install location: A different location other than default can be specified to install the client.
- Create a desktop shortcut: Use this option to create a shortcut on desktop.
- Create a Start menu shortcut: Use this option automatically add a shortcut for Bridge to the Start menu.
- Enable error reporting: Use this option if you want to share the crash dumps and log files with tableau. You can also turn this option off (or back on) in the client after installation.
- Click Install to begin the client installation.

Connecting the Bridge with Tableau Cloud
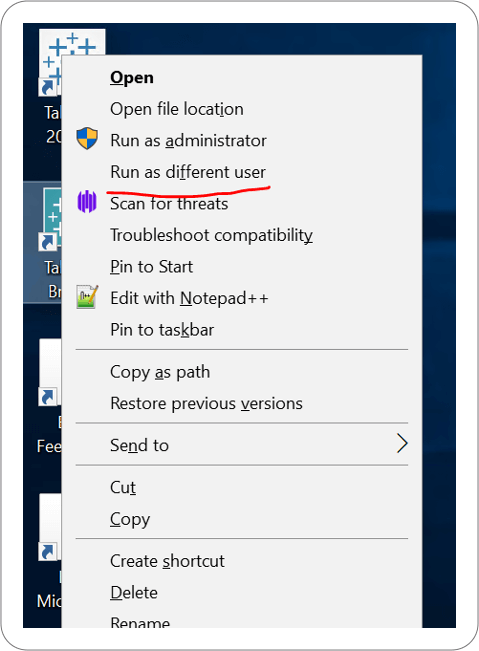
- After successful installation, launch the Bridge client by double-clicking the shortcut on your desktop or from Tableau Desktop (if installed on the same machine). To run Bridge under a different user account, right-click the shortcut while holding Ctrl+Shift, select “Run as different user,” and enter the required credentials.
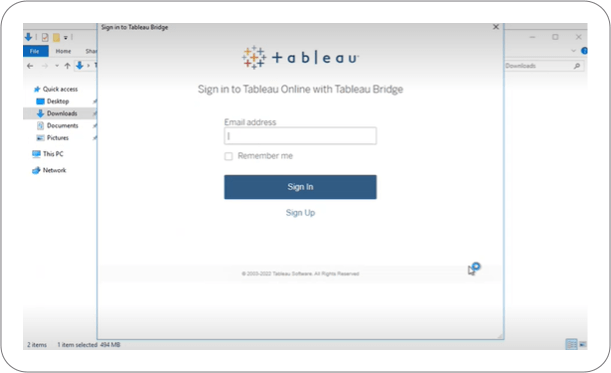
- Once the installation is successful, a prompt to sign to tableau cloud appears.
- Enter the applicable login details of tableau cloud. This account must be site admin on tableau.
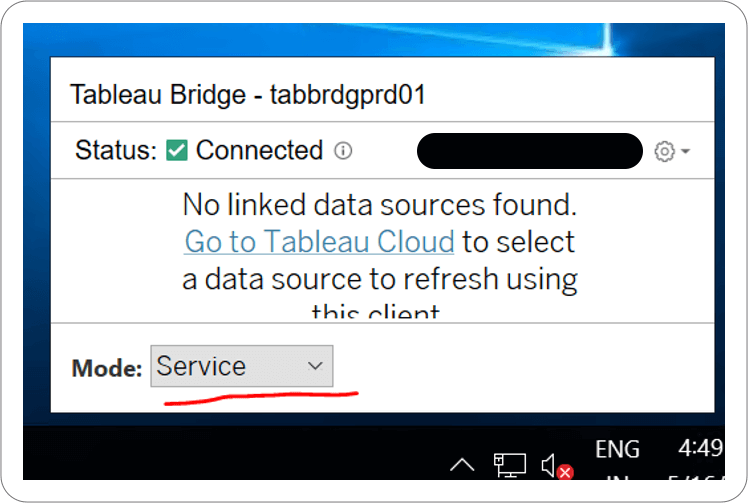
- Click on Tableau Bridge, the following interface will appear showing the status of the bridge.
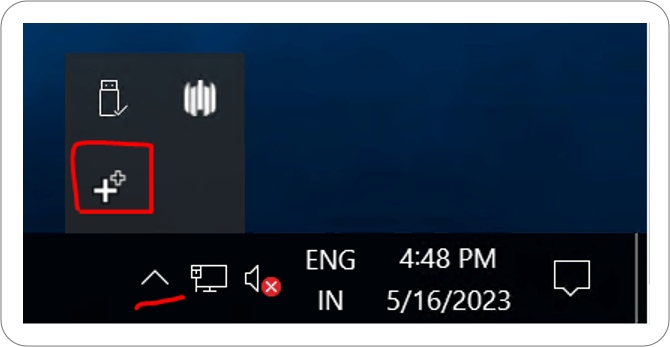
- If Bridge is currently in “Application” mode, change it to “Service” mode. This will prompt you to enter the system credentials for the machine where Bridge is installed.
- On tableau cloud, go to Settings>Bridge and verify the client’s name in the default pool.
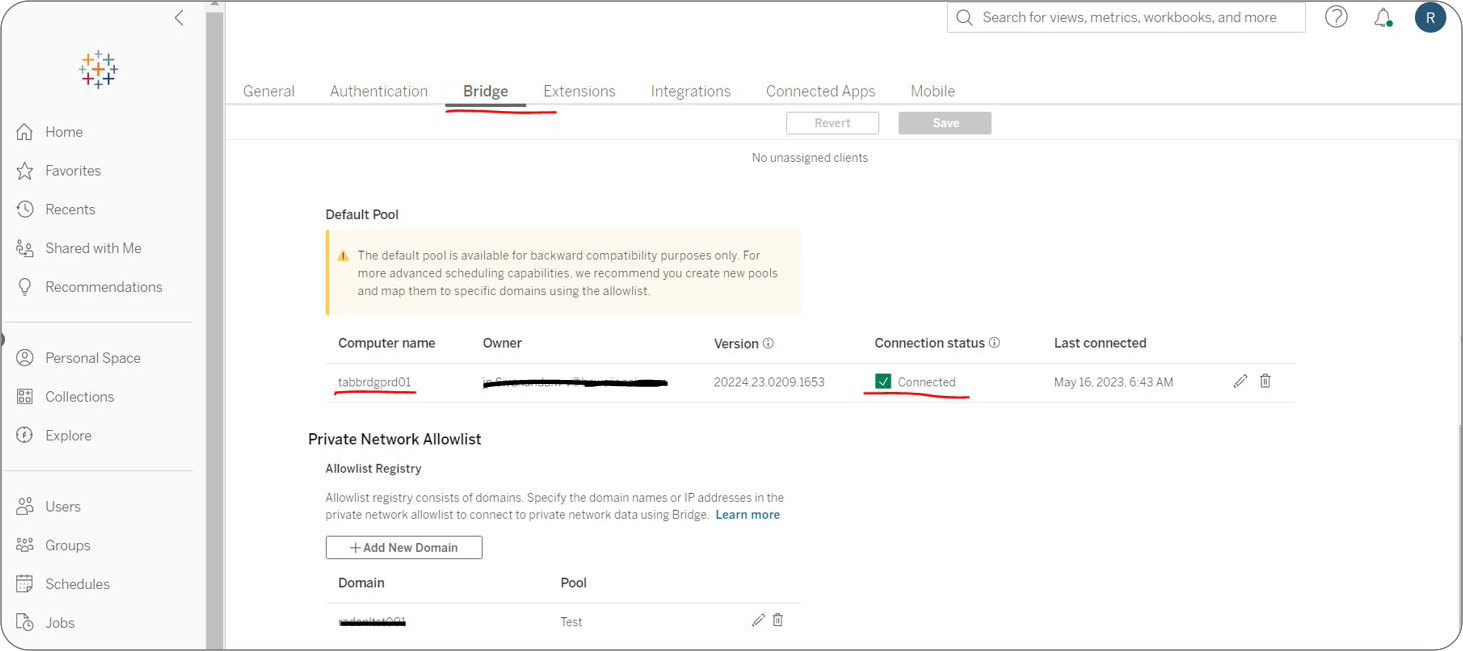
Congratulations! You’ve successfully installed Bridge and connected it to Tableau Cloud. The next step is to plan and configure bridge pools on Tableau Cloud and assign bridges to them.
Stay tuned for the third and final part of this series on Bridge Pooling!
Click here to Read Part 1


