When managing a project, Jira is an essential tool that tracks project details and provides a wealth of information, allowing you to analyze progress and promote growth. Tableau, with its powerful visualization capabilities, can then transform this data into visual insights to help you make informed decisions and take action.
Some key advantages of using Jira data in Tableau include:
Visual Dashboards
Transforming Jira data into visual dashboards enhances issue and story tracking. This makes it easy to identify patterns in issue resolution and address recurring problems, enabling the development of lasting solutions.
Historical Insights
By analyzing past trends, you can pinpoint recurring issues and trends, streamlining the resolution process.
KPI Tracking
Track key performance indicators (KPIs) related to issue resolution, resource allocation, and project timelines. This helps in monitoring performance and driving continuous improvement.
Streamlined Operations
Simplifying data into a single view enhances the ability to manage projects efficiently, reducing complexity and improving operational flow.
Resource Management
By visualizing resource allocation, you can quickly identify and resolve bottlenecks, ensuring efficient resource utilization.
Data-Driven Forecasting
The ability to analyze trends visually simplifies forecasting and planning, making issue resolution timelines more predictable.
In this blog we discuss creation of multiple data sources and bringing Jira data to life. Given below are the prerequisite and steps involved to integrate Jira data to the Tableau desktop.
Prerequisites
- The user should have access to Jira Software, Tableau Desktop, and SQL Server.
- If you’re migrating Jira applications to another server, create an export of your data as an XML backup. You will then be able to transfer data from your old database to your new database, as switching databases.
- Stop Jira before you begin unless you just started the installation and are running the Setup Wizard.
Solution I – Load Jira into Tableau using the python code
Prerequisites: The configuration required in the Jira software tool, is as follows:
Step 1
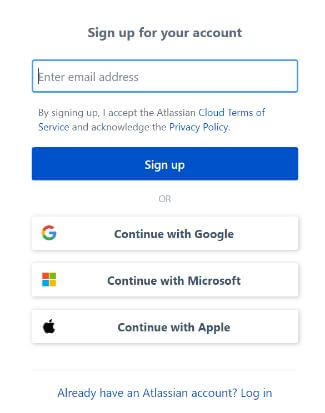
Create a Jira user account.
Step 2
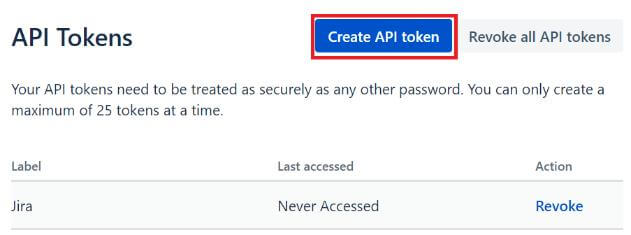
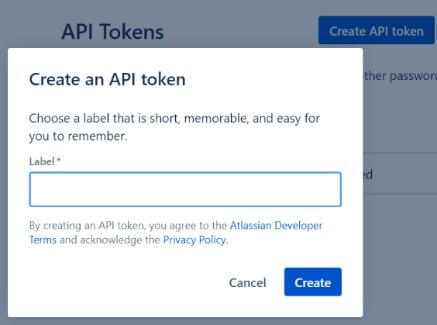
We need to have, a valid token, for authentication, which can be obtained, from the link https://id.atlassian.com/manage/api-tokens.
JQL: JQL stands for Jira Query Language. It is an efficient way, of fetching, JIRA-related data.
Here we will extract data by writing a python script that runs every hour and dump the JIRA data to a JSON file. Tableau can consume JSON file easily and it works for both the JIRA cloud and server.
Install the Jira library using the following command:
pip install jiraApproach:
Import the jira, json, and sys module.
Construct a Jira client instance, by using-
The server key, which is your domain name, is created on the Atlassian account.
Basic authentication parameters, your registered email ID, password, and the unique token received.
Get a JIRA client instance bypassing, Authentication parameters.
Search all issues mentioned against a project name (Display the details, like Issue key, Summary, Reporter name, using the print statement).
Check the Implementation code below:
# import the installed Jira library
from jira import JIRA
import json
import sys
# Specify a server key. It should be your domain name link. yourdomainname.atlassian.net
# Get a JIRA client instance, pass, Authentication parameters, and the Server name.
jira = JIRA(server="yourserver", auth=('uid','pwd'))# Search all issues mentioned against a project name.
# Get all issues in project
issues = jira.search_issues('project=yourproject',maxResults=sys.maxsize)# Keep only raw data
cleaned_list = [issue.raw for issue in issues]# Dump cleaned list as a json file
with open('result.json','w')as fp:
    json.dump(cleaned_list,fp)
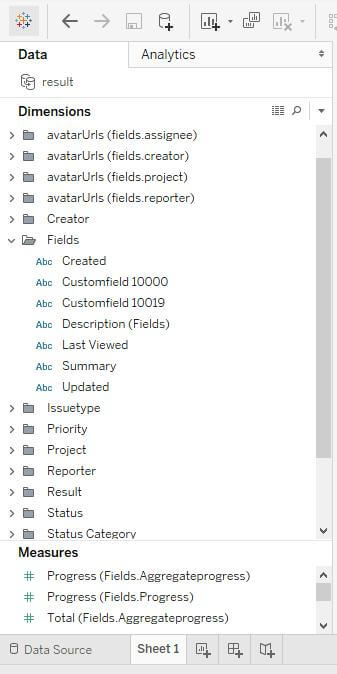
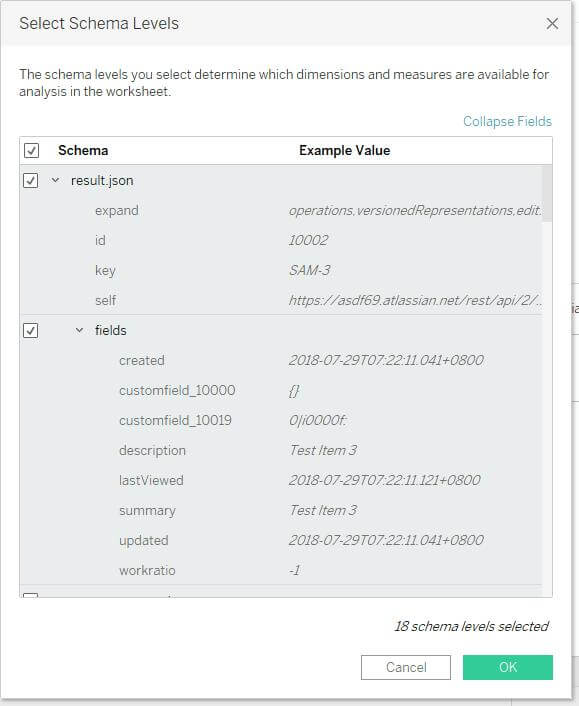
While making the connection in the tableau select all schema levels.
Here is a preview of the available fields after creating the connection.
Solution II – Loading Jira Data into Tableau using SQL Server
Step 1
Connecting Jira Application to SQL Server
When creating the database, remember your database name, username, schema name, and port number, because you’ll need them later to connect Jira to your database.
1. Create a database for Jira (e.g. jiradb).
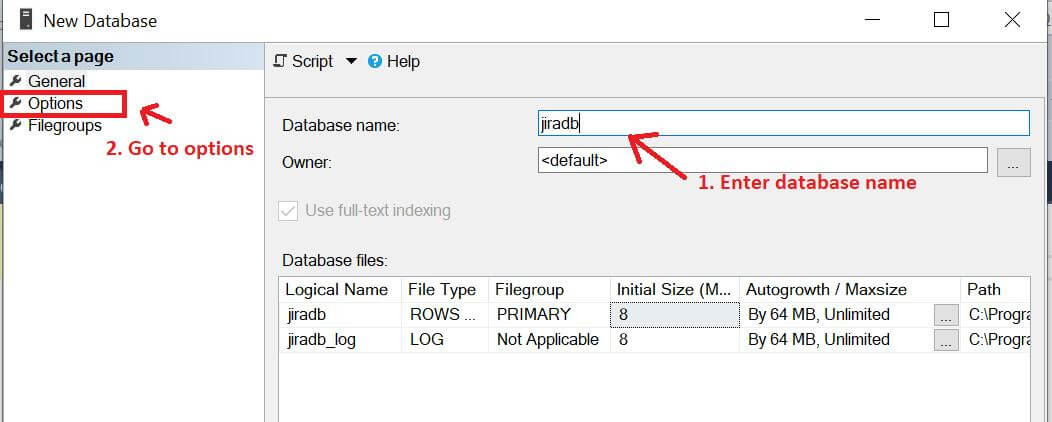
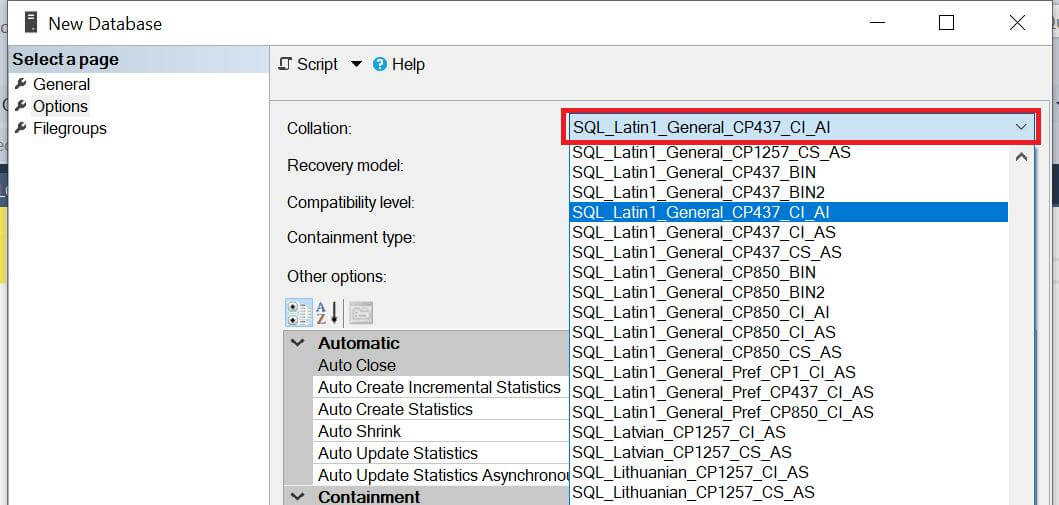
- In options, set collation type, make sure the collation type is case-insensitive.
We support SQL_Latin1_General_CP437_CI_AI and Latin1_General_CI_AI as case-insensitive, accent-insensitive, and language neutral collation types. If your SQL Server installation’s collation type settings have not been changed from their defaults, check the collation type settings.
- SQL Server uses Unicode encoding to store characters. This is sufficient to prevent any possible encoding problems.
2. Create a database user which Jira will connect as (e.g. jiradbuser). This user should not be the database owner but should be in the db_owner role.
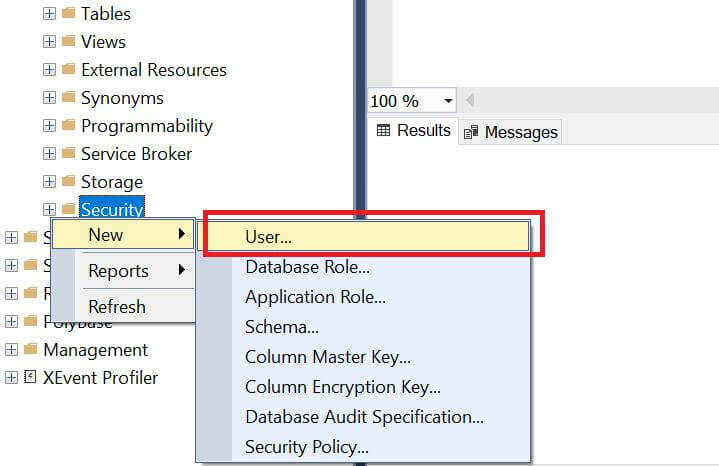
3. Create an empty ‘schema’ in the database for the Jira tables (e.g. jiraschema).
CREATE SCHEMA jiraschema4. Make sure that the database user has permission to connect to the database, and to create and populate tables in the newly created schema.
5. Make sure that TCP/IP is enabled on SQL Server and is listening on the correct port. A default SQL Server installation uses port number 1433.
6. Make sure that SQL Server is operating in the appropriate authentication mode.
By default, SQL Server operates in ‘Windows Authentication Mode’. However, if your user is not associated with a trusted SQL connection, i.e., ‘Microsoft SQL Server, Error: 18452’ is received during Jira start-up, you will need to change the authentication mode to ‘Mixed Authentication Mode’. Read the Microsoft documentation on authentication modes and change the authentication mode to ‘Mixed Authentication Mode’
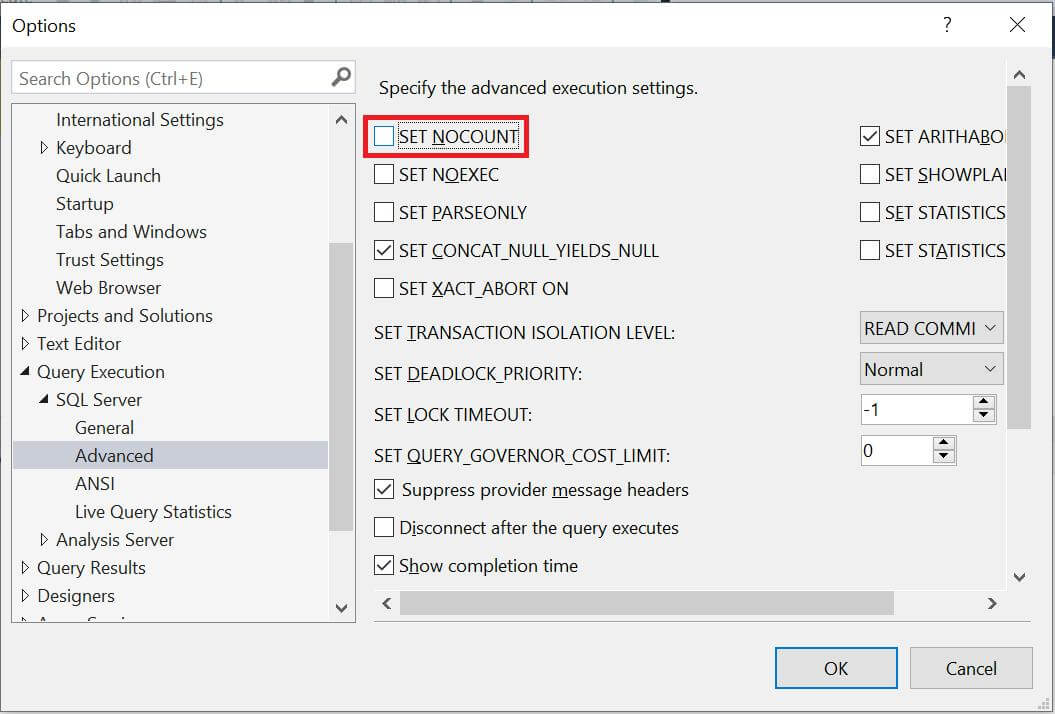
7. Turn off the NOCOUNT option.
a. Open SQL Server Management Studio.
b. Go to Tools > Options > Query Execution > SQL Server > Advanced and clear the NOCOUNT check box.
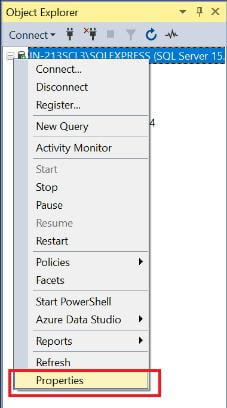
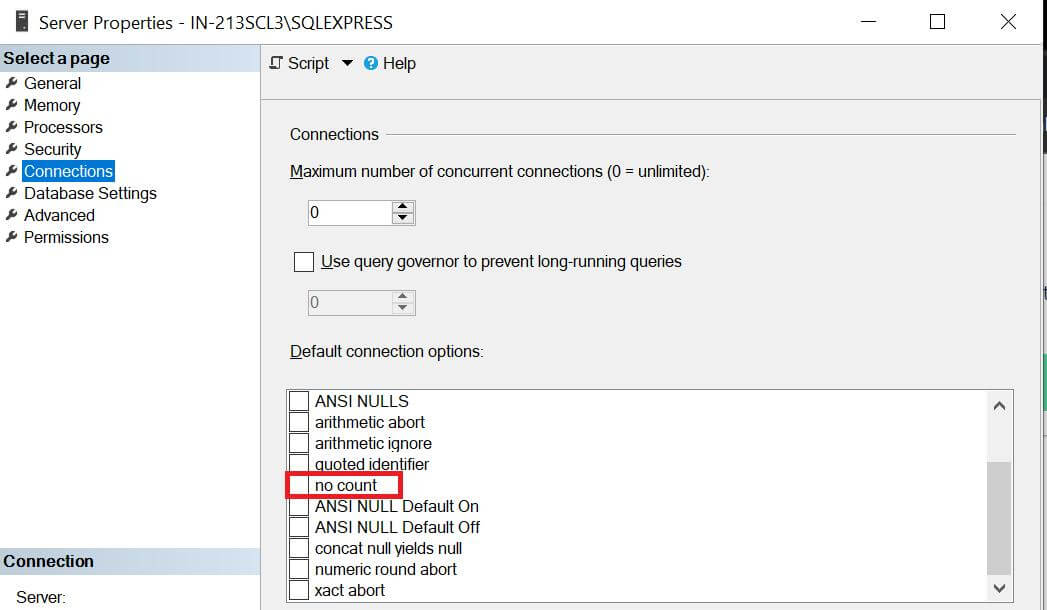
c. Right-click your server in the Object Explorer and go to Properties > Connections > Default Connections. Clear the no count option.
8. Access the Query Console by right-clicking on the newly created database and selecting ‘New Query‘. Run the following command to set the isolation level.
ALTER DATABASE jiradb SET READ_COMMITTED_SNAPSHOT ONStep 2
Configure Jira to connect to the database
There are two ways to configure your Jira server to connect to your SQL Server database.
a. Using the Jira setup wizard — Use this method if you have just installed Jira and are setting it up for the first time. Your settings will be saved to the dbconfig.xml file in your Jira application home directory.
The Jira setup wizard will display when you access Jira for the first time in your browser.
- In the first screen, ‘Configure Language and Database’, set Database Connection to My own database.
- Set Database Type to SQL Server.
- Fill out the fields, as described in the Database connection fields section below.
- Test your connection and save.
b. Using the Jira configuration tool — Use this method if you have an existing Jira instance. Your settings will be saved to the dbconfig.xml file in your Jira application home directory.
Run the Jira configuration tool as follows:
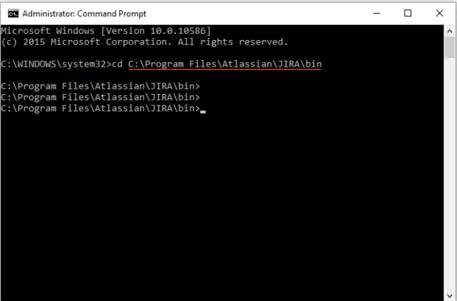
- Windows: Open a command prompt and run config.bat in the bin sub-directory of the Jira installation directory.
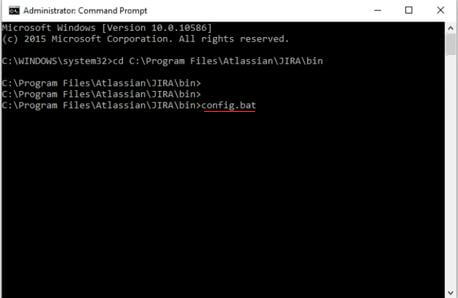
- Linux/Unix: Open a console and execute config.sh in the bin sub-directory of the Jira installation directory.
- After running these commands, Jira configuration tool will open.
- Navigate to the Database tab and set Database type to SQL Server and edit the Database name to ‘jiradb’.
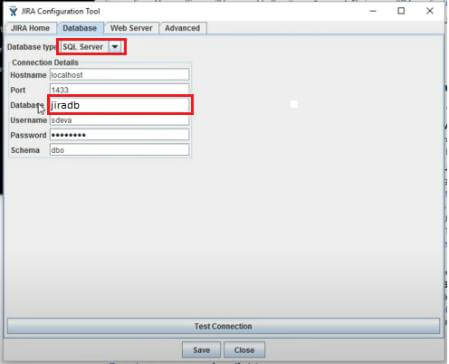
- Fill out the fields, as described in the Database connection fields section below.
- Test your connection and save.
- Restart Jira.
Step 3
Loading SQL Server Database into Tableau Desktop
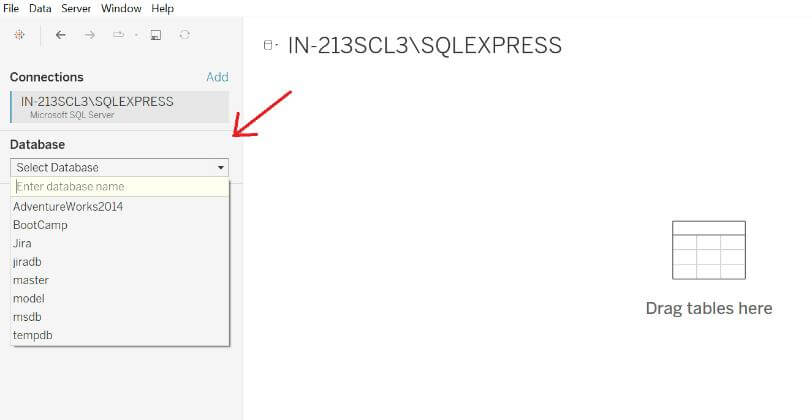
- Open Tableau Desktop and under the connections pane, select Microsoft SQL Server.
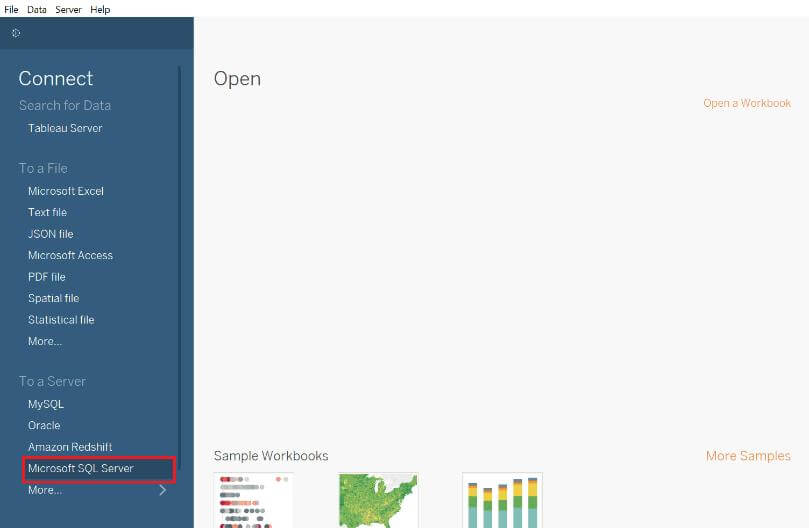
- Copy the Server link from Microsoft SQL Server and paste on into the dialogue box, fill in other details then click on the ‘Sign in’ option.
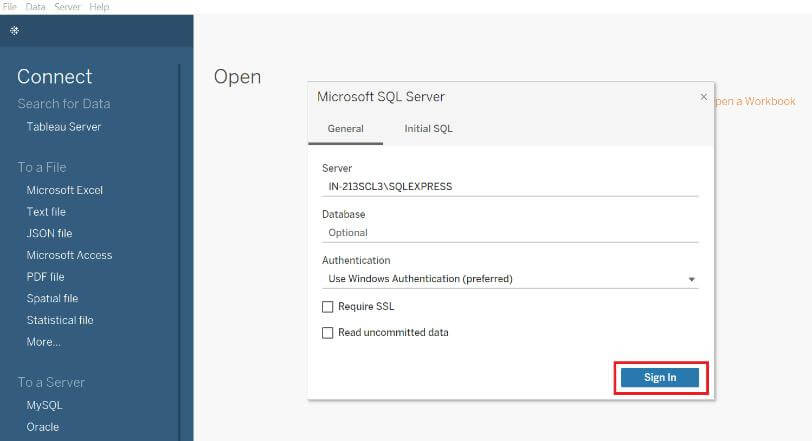
- This will connect you to the tableau desktop, you can select the database and start your analysis.
Solution III – Load Jira data into Tableau using Tableau Connector
Step 1
Log into Jira Instance.
First, you need to log in to the Jira instance that you want to integrate with Tableau.
Step 2
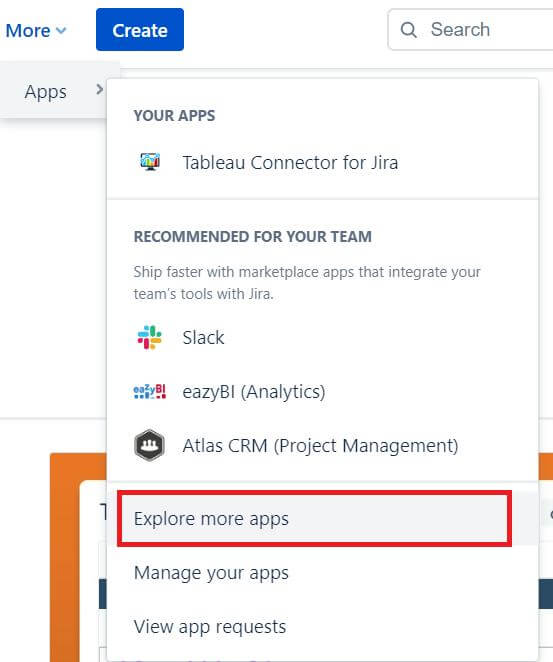
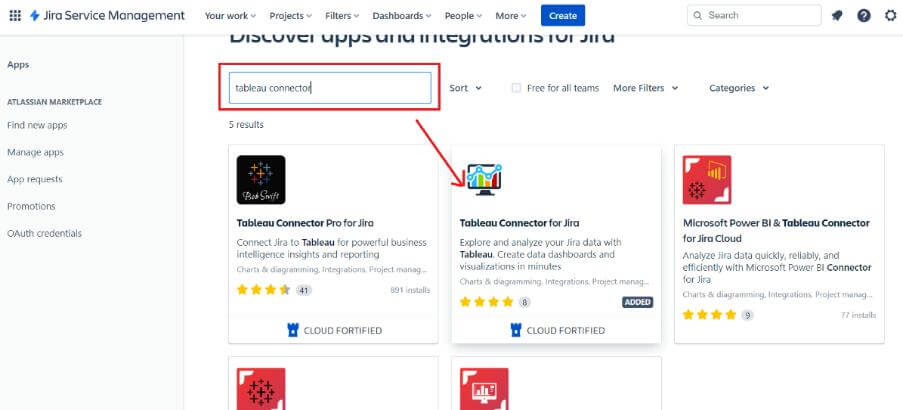
Go to the Apps section, in “Explore more apps” search for Tableau Connector.
Here we are locating the Plugin (Tableau Connector for Jira) on the Atlassian Marketplace. Further, we can select the correct version of the plugin so that we can install it.
Step 3
Install Tableau Connector for Jira.
Click either “free trial” to activate the free license or “buy now” to purchase the add-on license, and the installation process begins.
Alternatively, you can install the plugin by going to the application page on the Atlassian Marketplace directly.

Step 4
Configure the Plugin Settings.
Now your new app needs to be configured to work as intended. Click on manage apps on Jira admin, find Tableau Connector for Jira, and finally go to Plugin settings.

Step 5
Start Creating and Importing Data from Jira to Tableau.
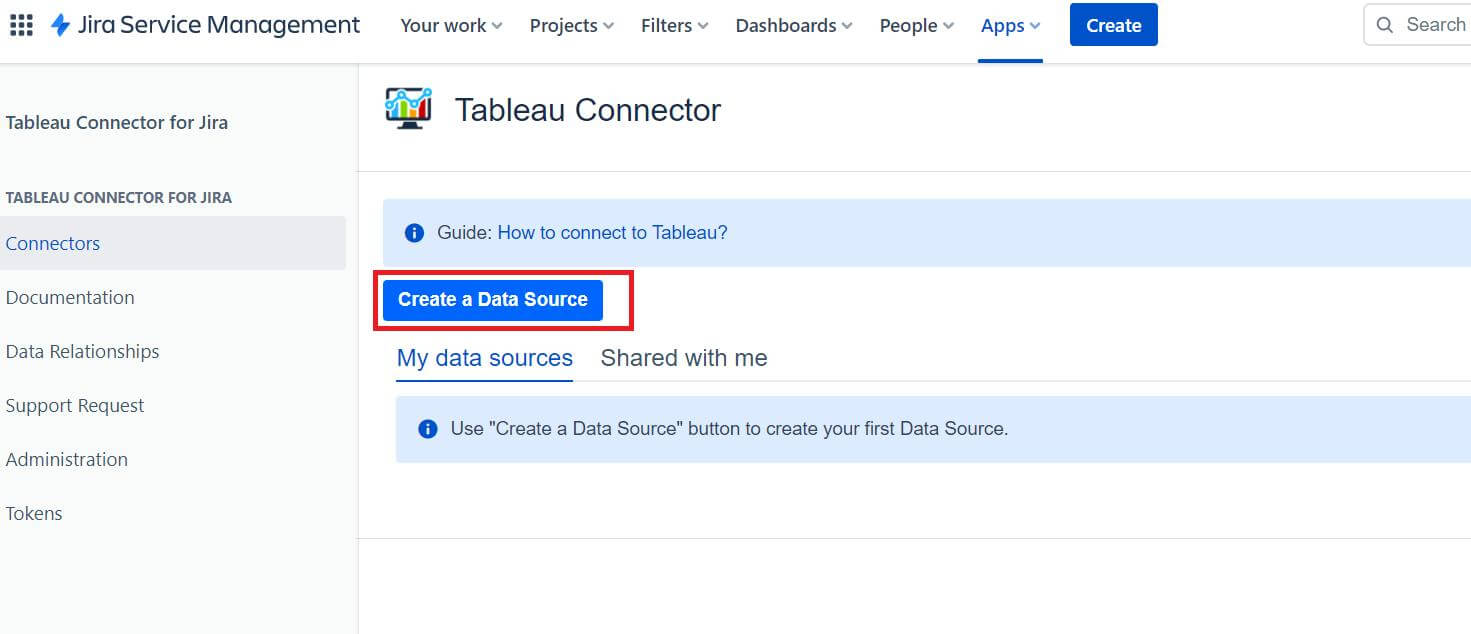
A Tableau tab will be added to your main menu on Jira once the plugin is installed. Click data sources to begin adding new data sources.
Step 6
Import the Data from Jira into Tableau
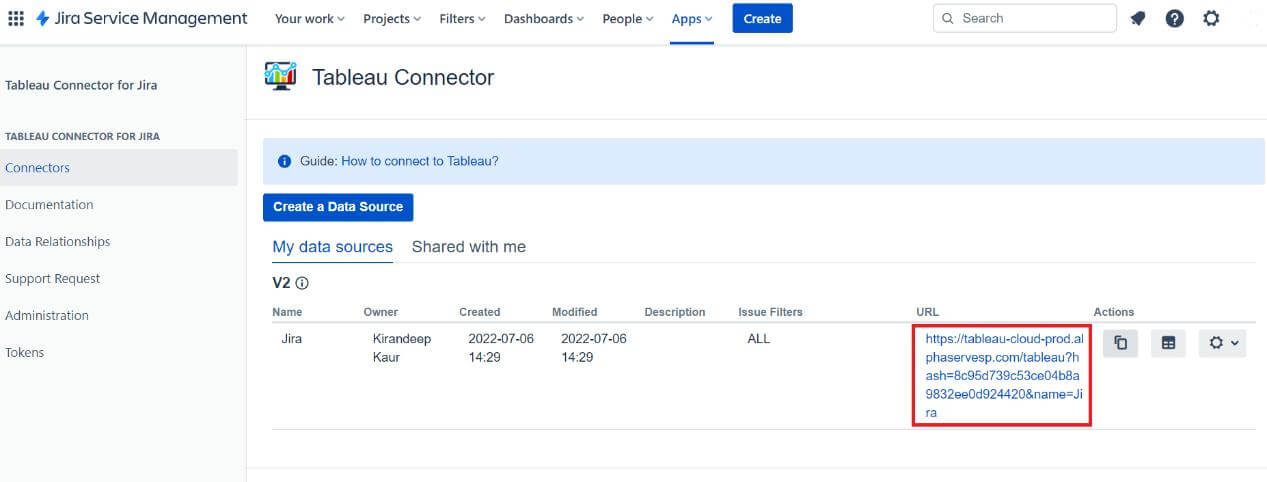
Now you need to insert the data source URL generated into your Tableau product.
- First copy the Data URL from the Tableau connector.
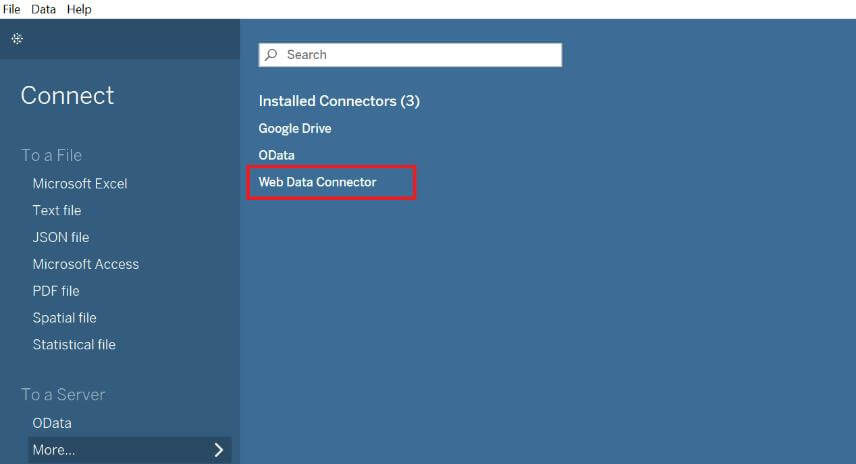
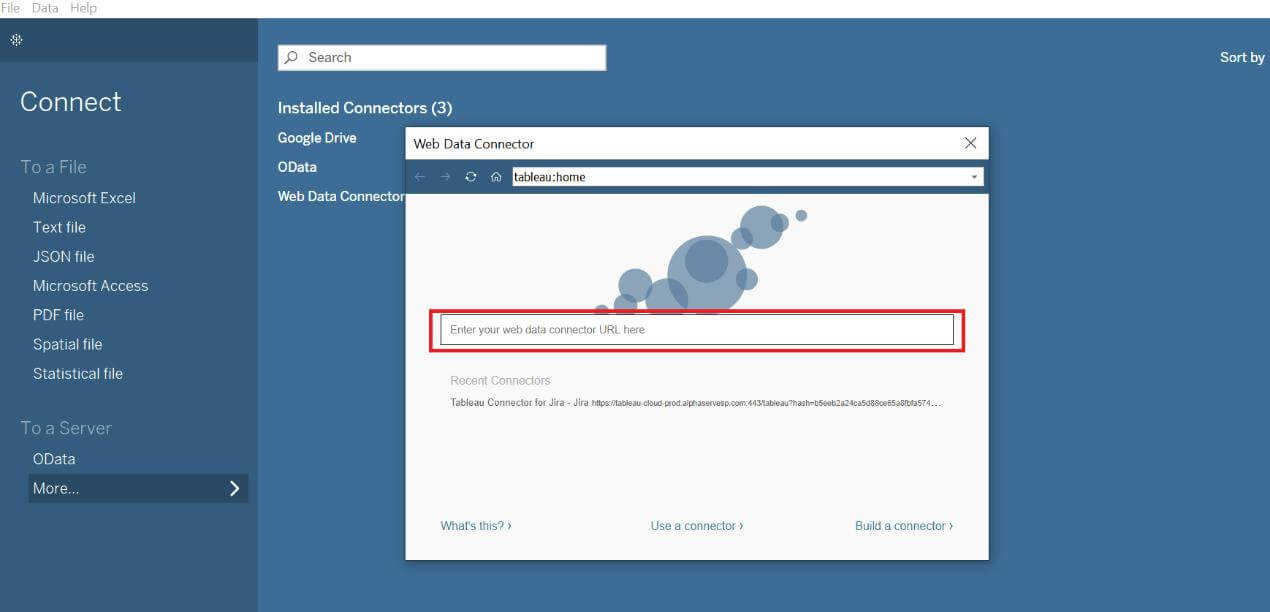
- In Tableau Desktop, select Web Data Connector and Paste the URL.
Integrating Jira data with Tableau provides a powerful way to visualize and interpret project metrics, facilitating better decision-making and operational efficiency. Whether using Python scripts, SQL Server connections, or a Tableau Connector, each solution presented here offers distinct advantages based on your project needs and technical environment. By choosing the approach that best suits your setup, you can streamline your project tracking and gain deeper, data-driven insights to enhance project outcomes.


 Media Coverage
 Press Release

